Minidocs Guide
Everything Minidocs does, in one page.
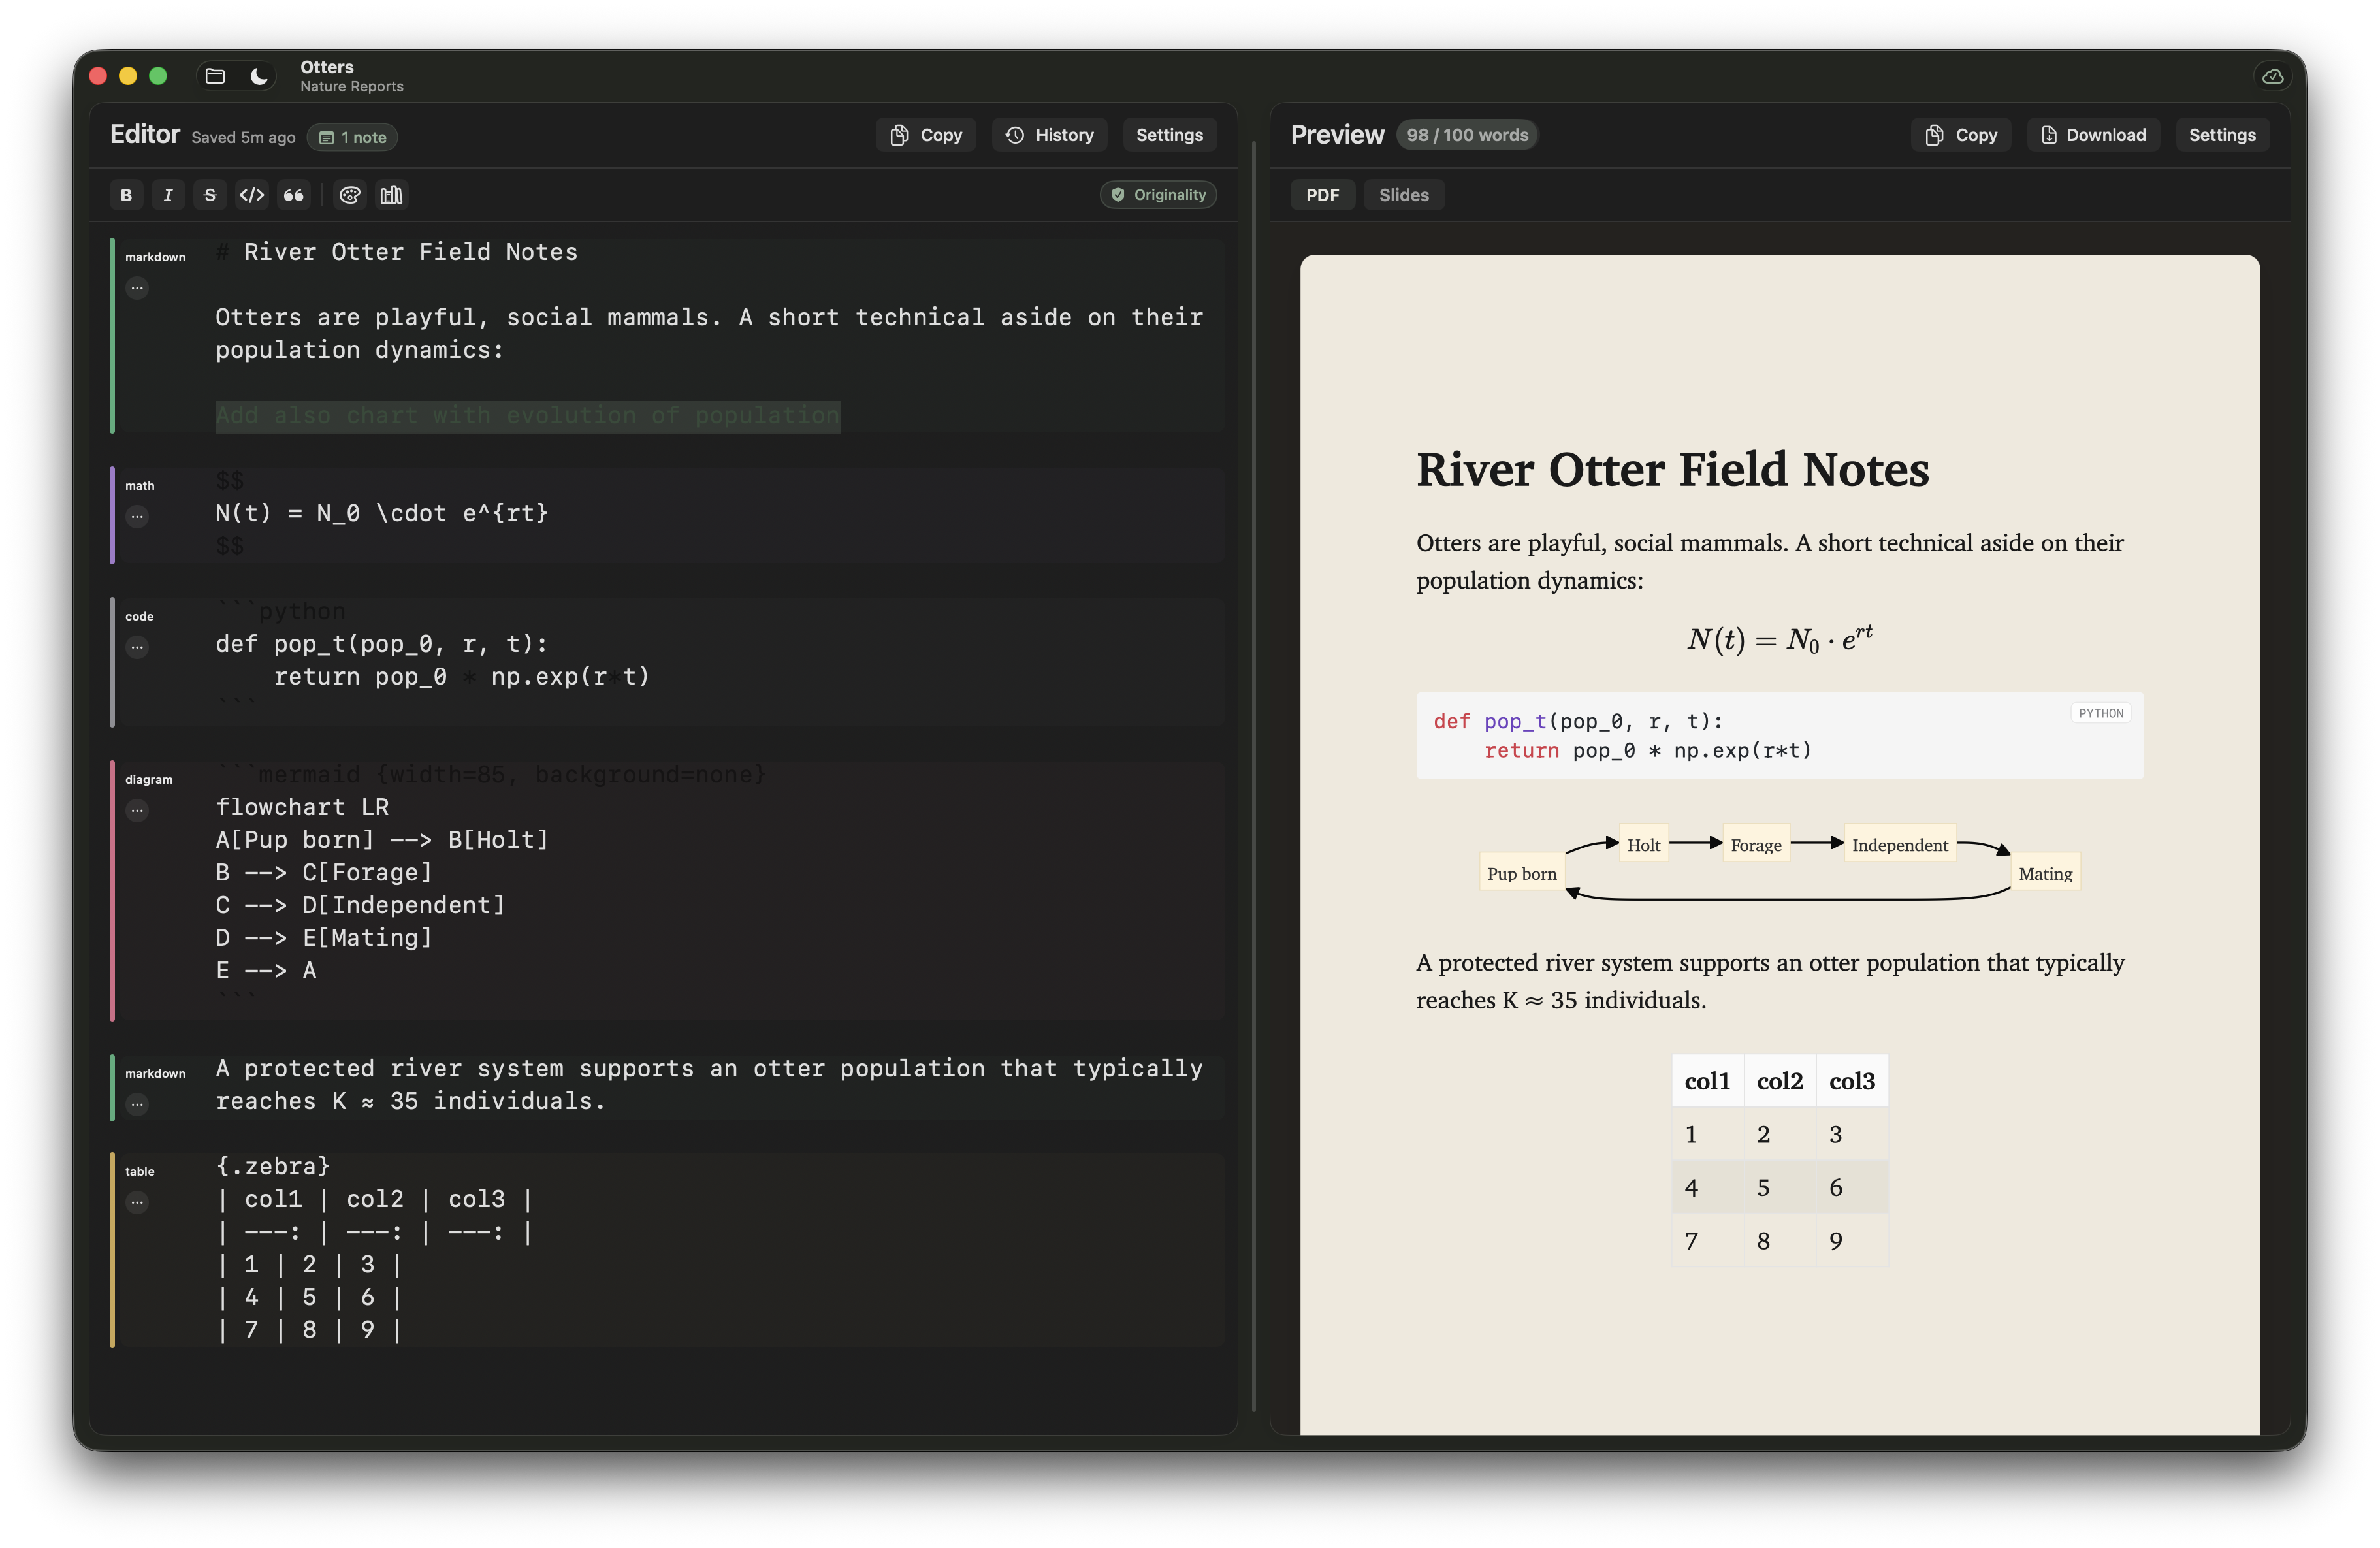
Minidocs is built around one flow: write in Markdown, check the final document live, adjust the output, and export when it is ready. This Guide covers every feature, every slash command, every shortcut. Use the table of contents to jump; every section has a shareable link.
Getting started
- Create a project with ⌘N or from the Projects sidebar. Pick a template if you want a head start.
- Write Markdown on the left. The preview on the right updates as you type.
- Export to PDF with ⌘E, or switch the preview to Slides to render the same source as a deck.
Everything stays inside one window. There is no project, file, or settings dialog hidden in a menu — anything you can change is visible from the editor.
Editor essentials
The editor is a plain-text canvas with quiet visual aids, designed so the Markdown source round-trips byte-for-byte to disk. Smart quotes, dash substitutions, and autocorrect are off on purpose.
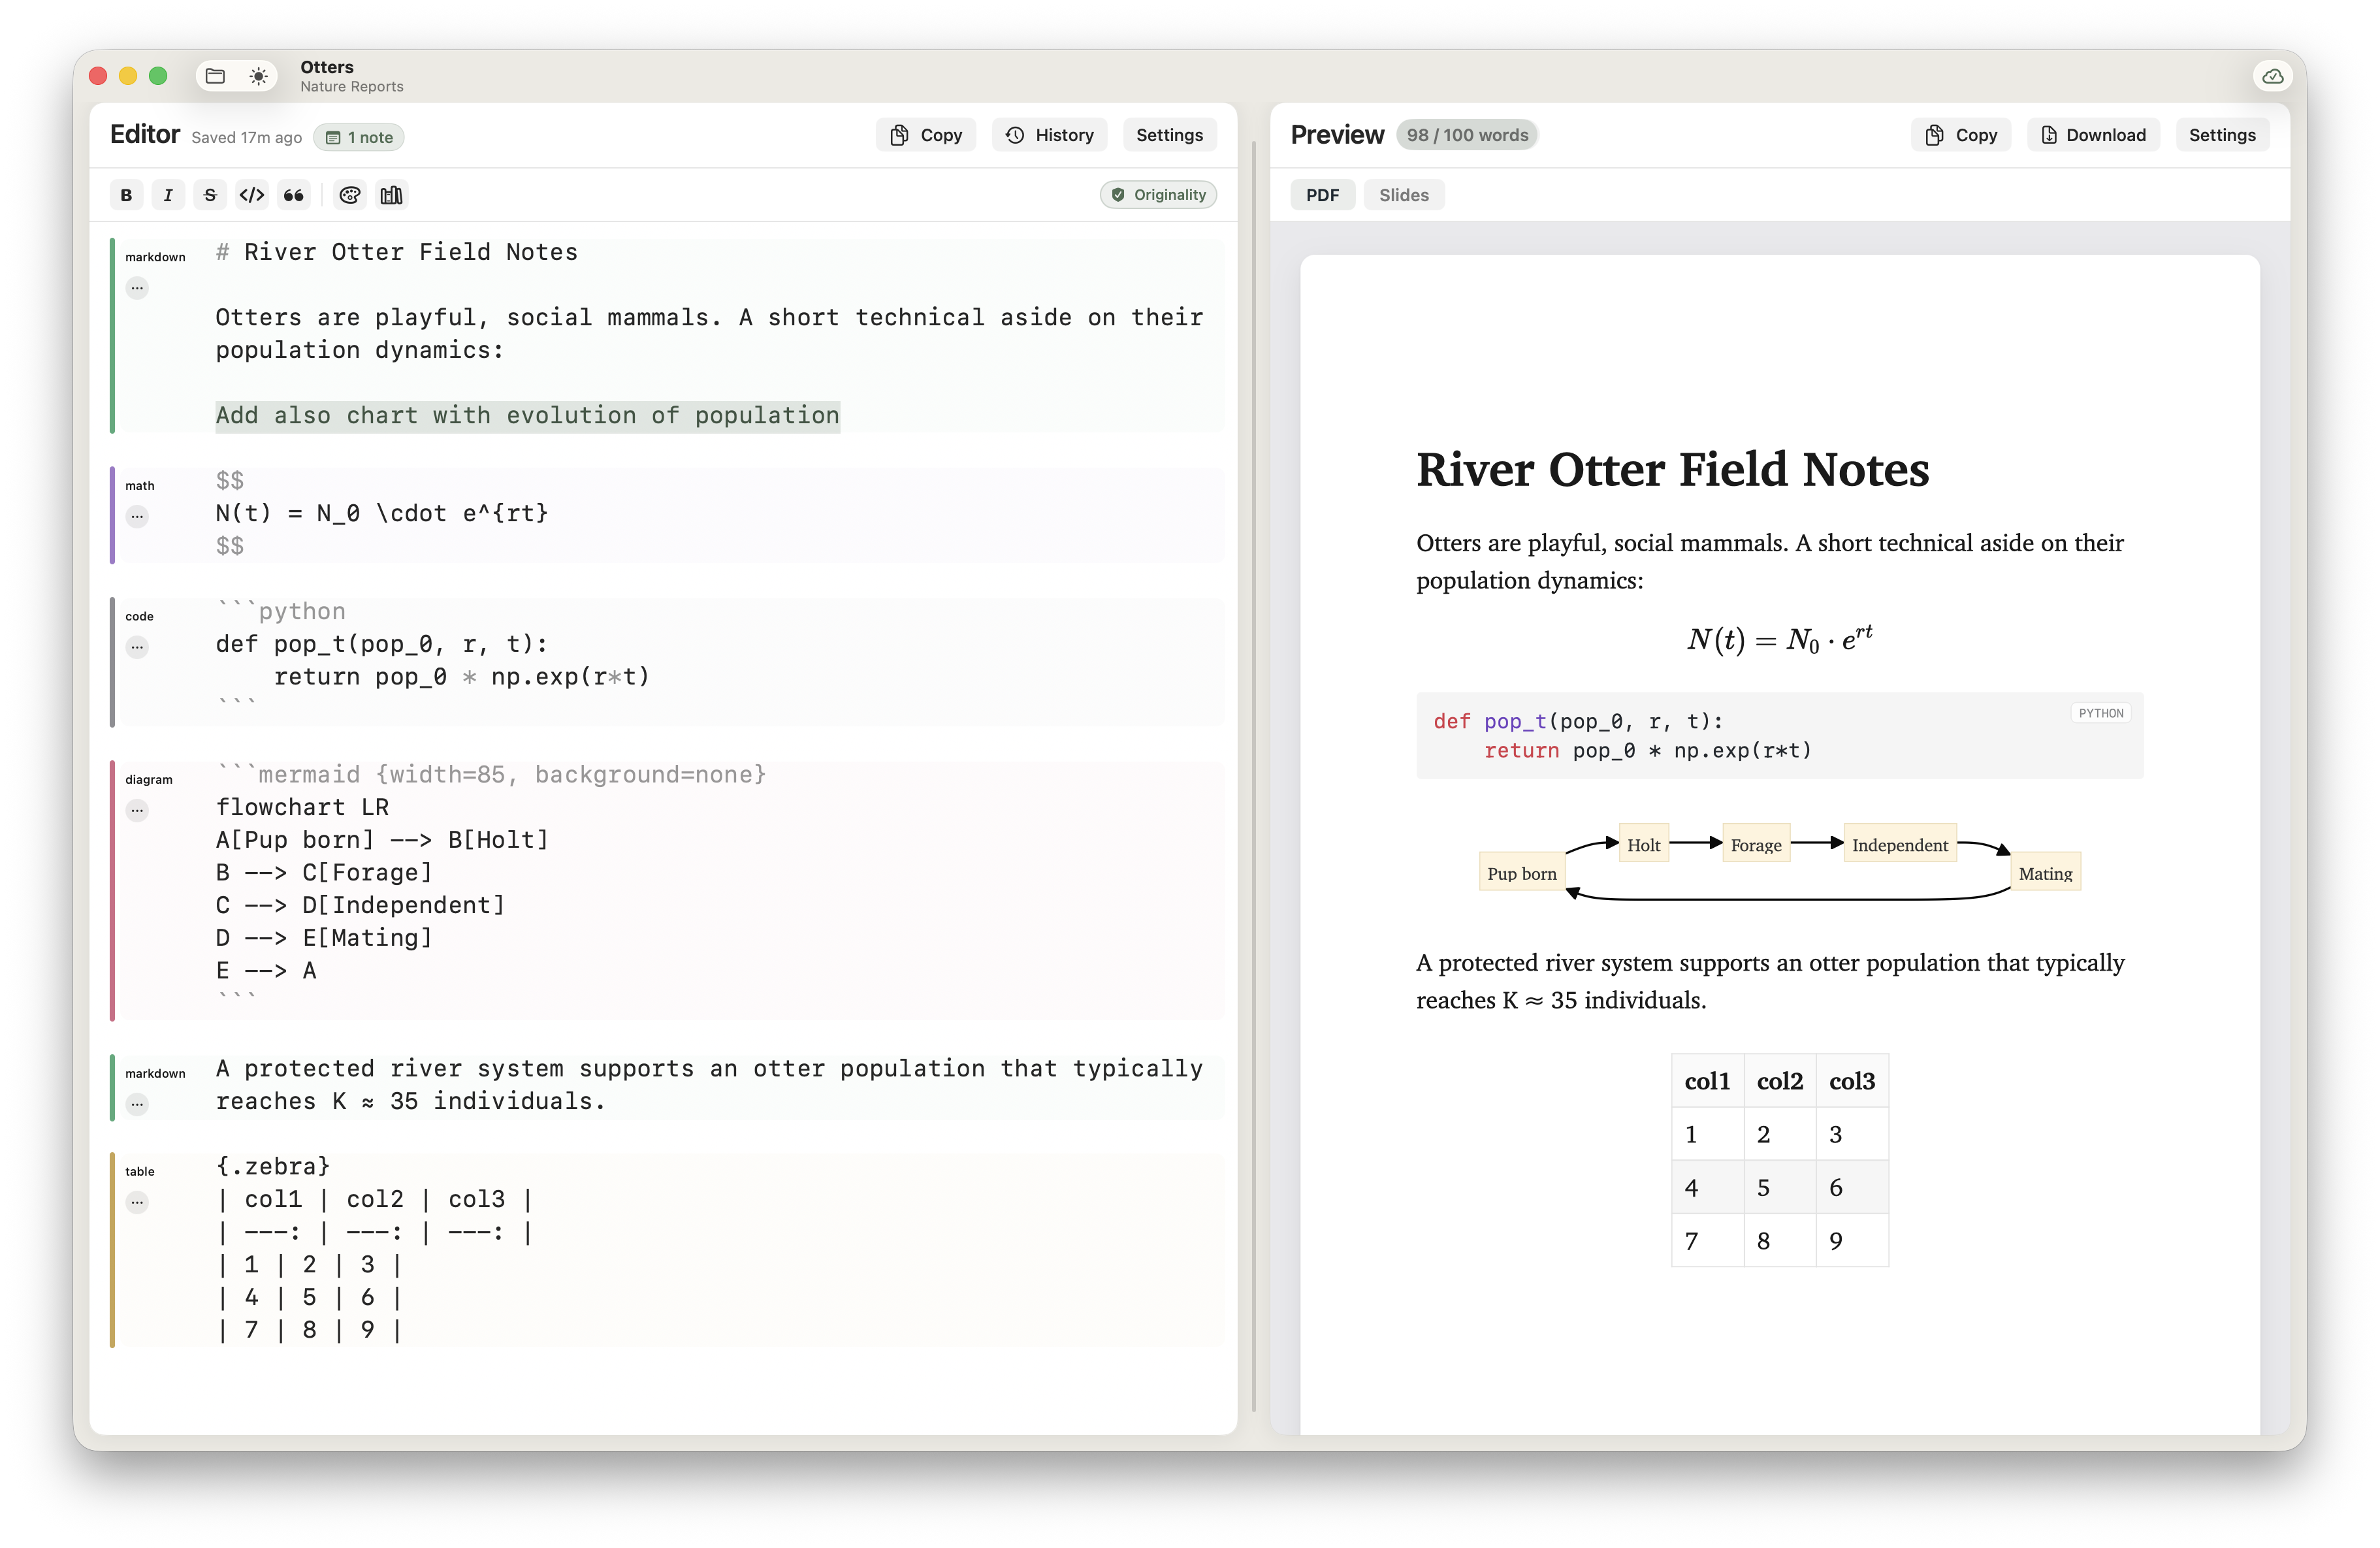
- Block rails. A coloured stripe in the gutter labels each block — prose, code, table, image, diagram, math. Adjacent blocks of the same kind merge into one rail so the editor reads as a calm column. Image and diagram blocks each get a
…button for customisation. Toggle rails on or off in Editor Settings. - Syntax dimming. Markdown markers (
**,~~,`, fences, list bullets) fade to secondary on inactive lines so the prose stays in front. The line your caret sits on shows everything at full strength so you can edit precisely. - Find & replace. ⌘F opens a popover above the editor with live match counts, replace one, and replace all. Esc closes it.
- Word count goal. Set a per-document target in Editor Settings. The chip turns sage and a quiet toast announces the goal the first time you cross it. The goal is per-document; nothing is logged or shared.
- Document history. Open History from the editor toolbar to compare an earlier draft against the current document side-by-side, or restore a previous version. History is local to your machine.
- Font size shortcuts. ⌘+ and ⌘− nudge editor and preview text together; ⌘0 resets both.

Block rails & find / replace
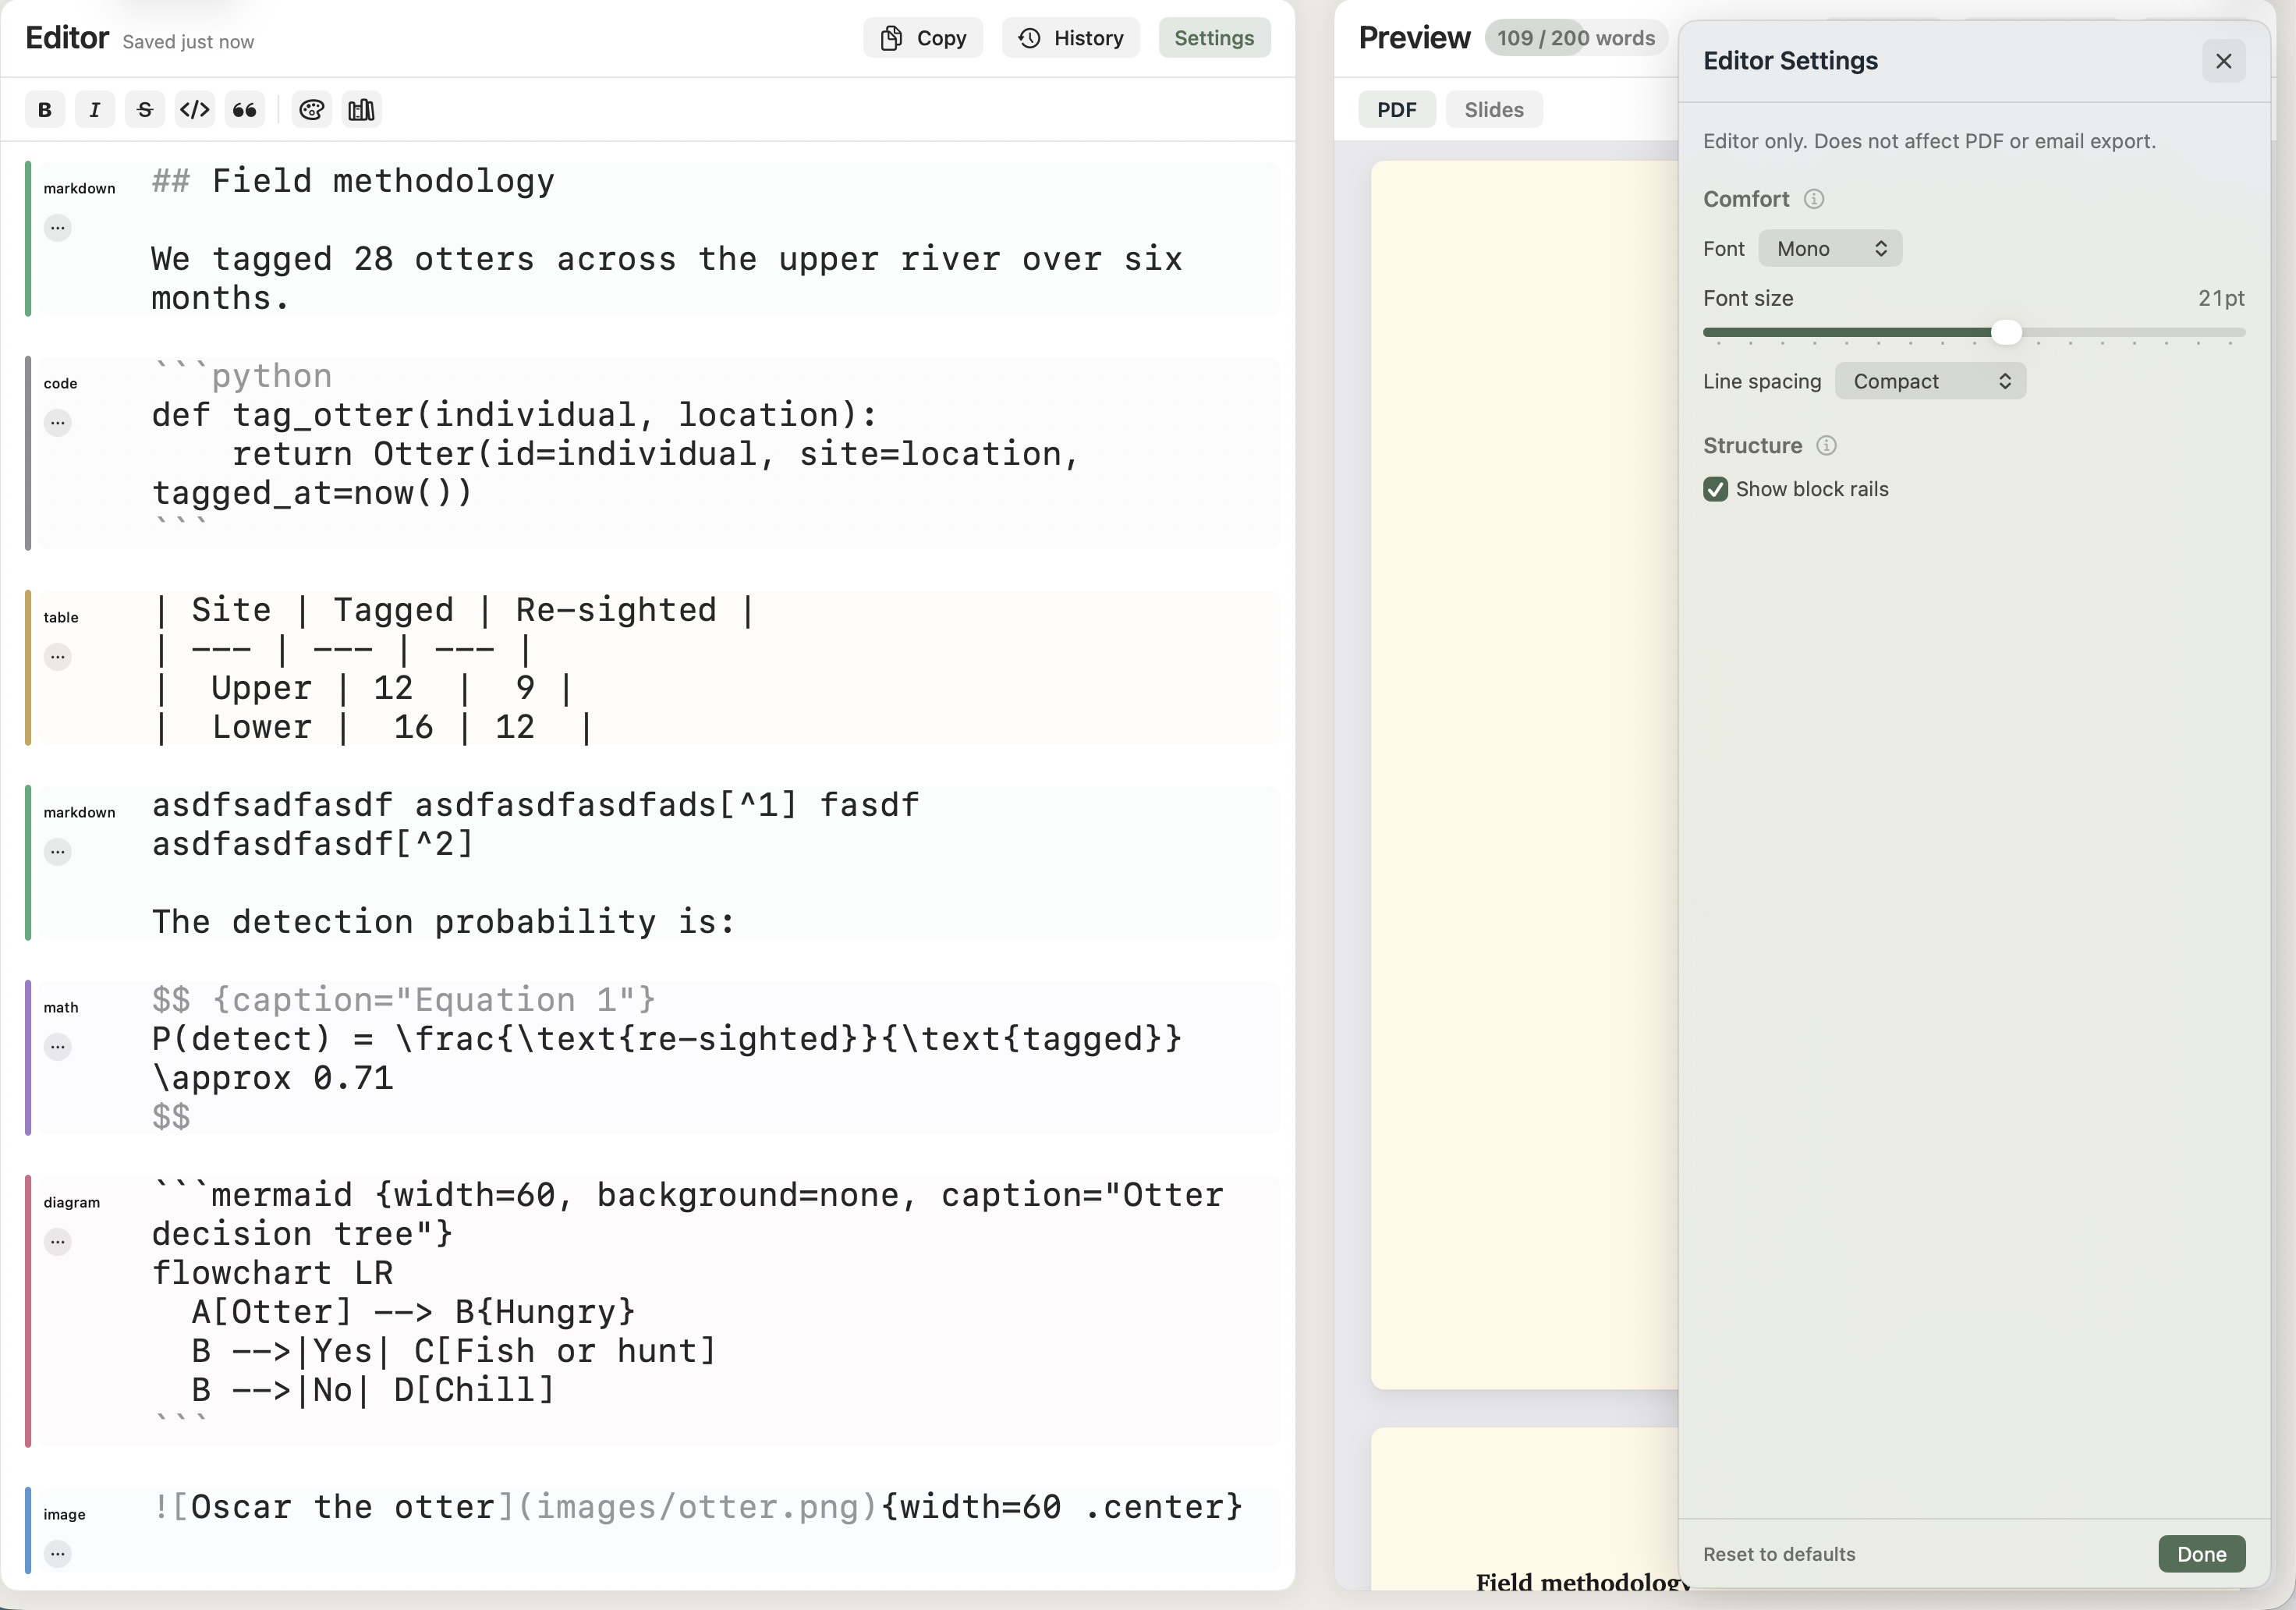
Editor Settings
Formatting toolbar
Above the editor sits a small formatting strip. Every action wraps the current selection or inserts a placeholder so you can keep typing.
**…**.*…*.~~…~~.> . From the toolbar or the Editor menu.--- on its own line.{#HEX|…}. Useful inside lists and blockquotes where raw HTML is awkward./source).
Slash commands
Type a command on its own line in the editor and Minidocs replaces the line with a rich block — usually after a small sheet asks for the details. Eleven commands today.
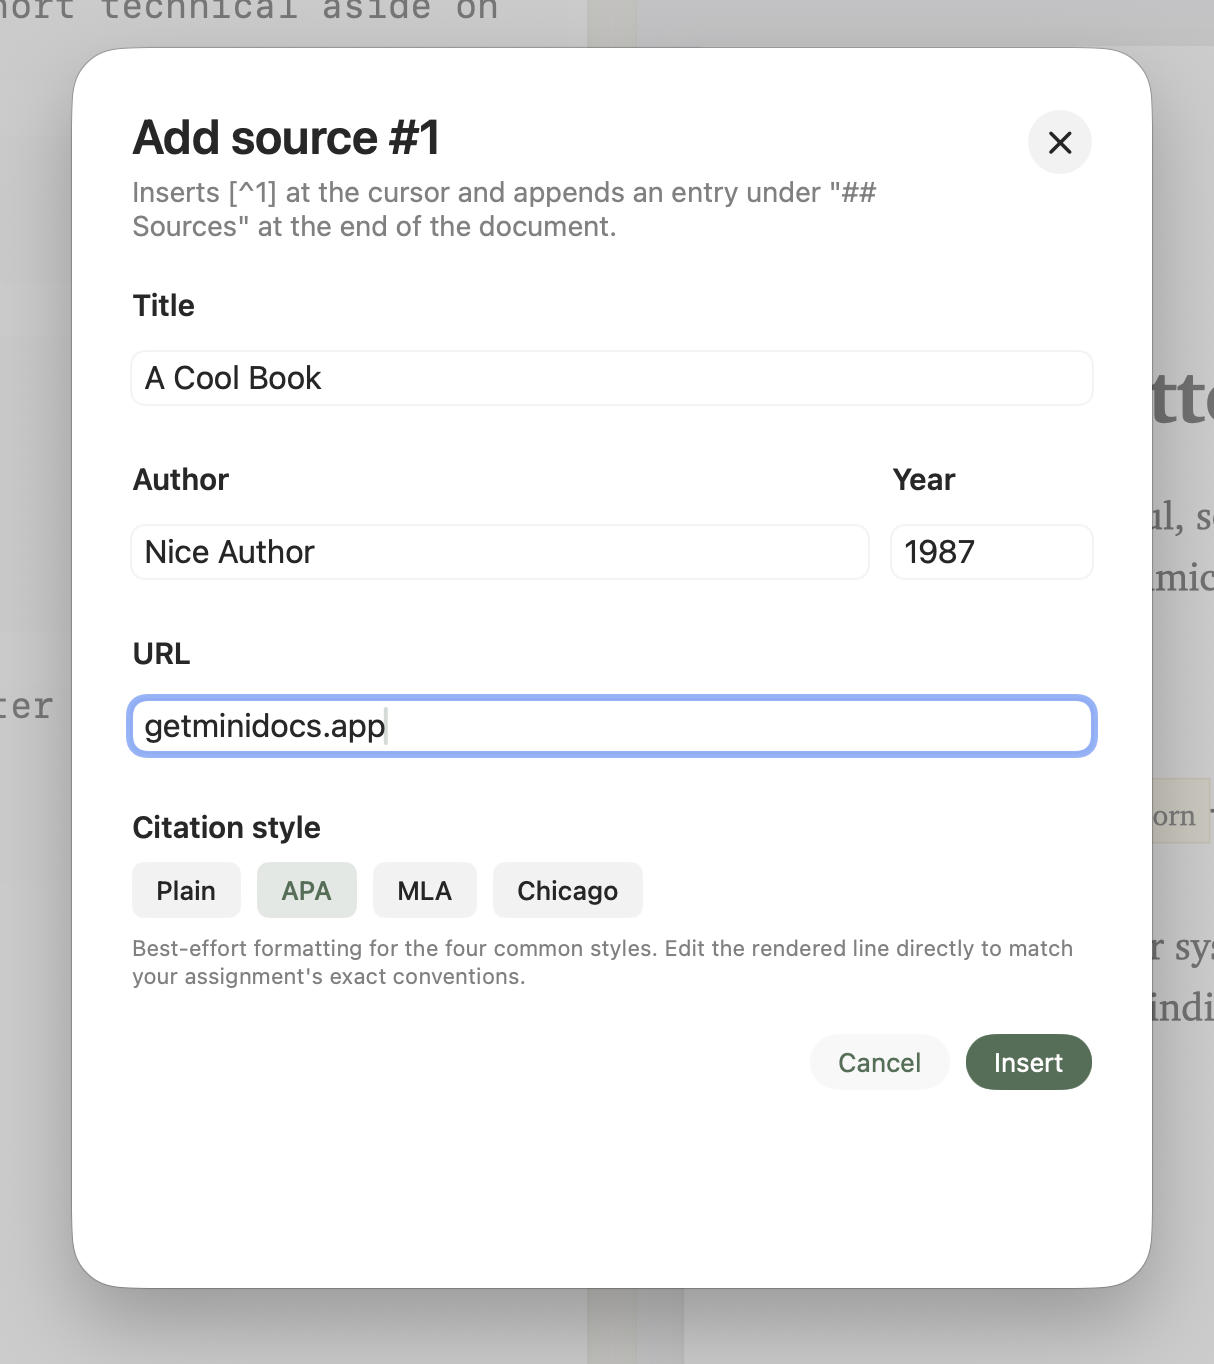
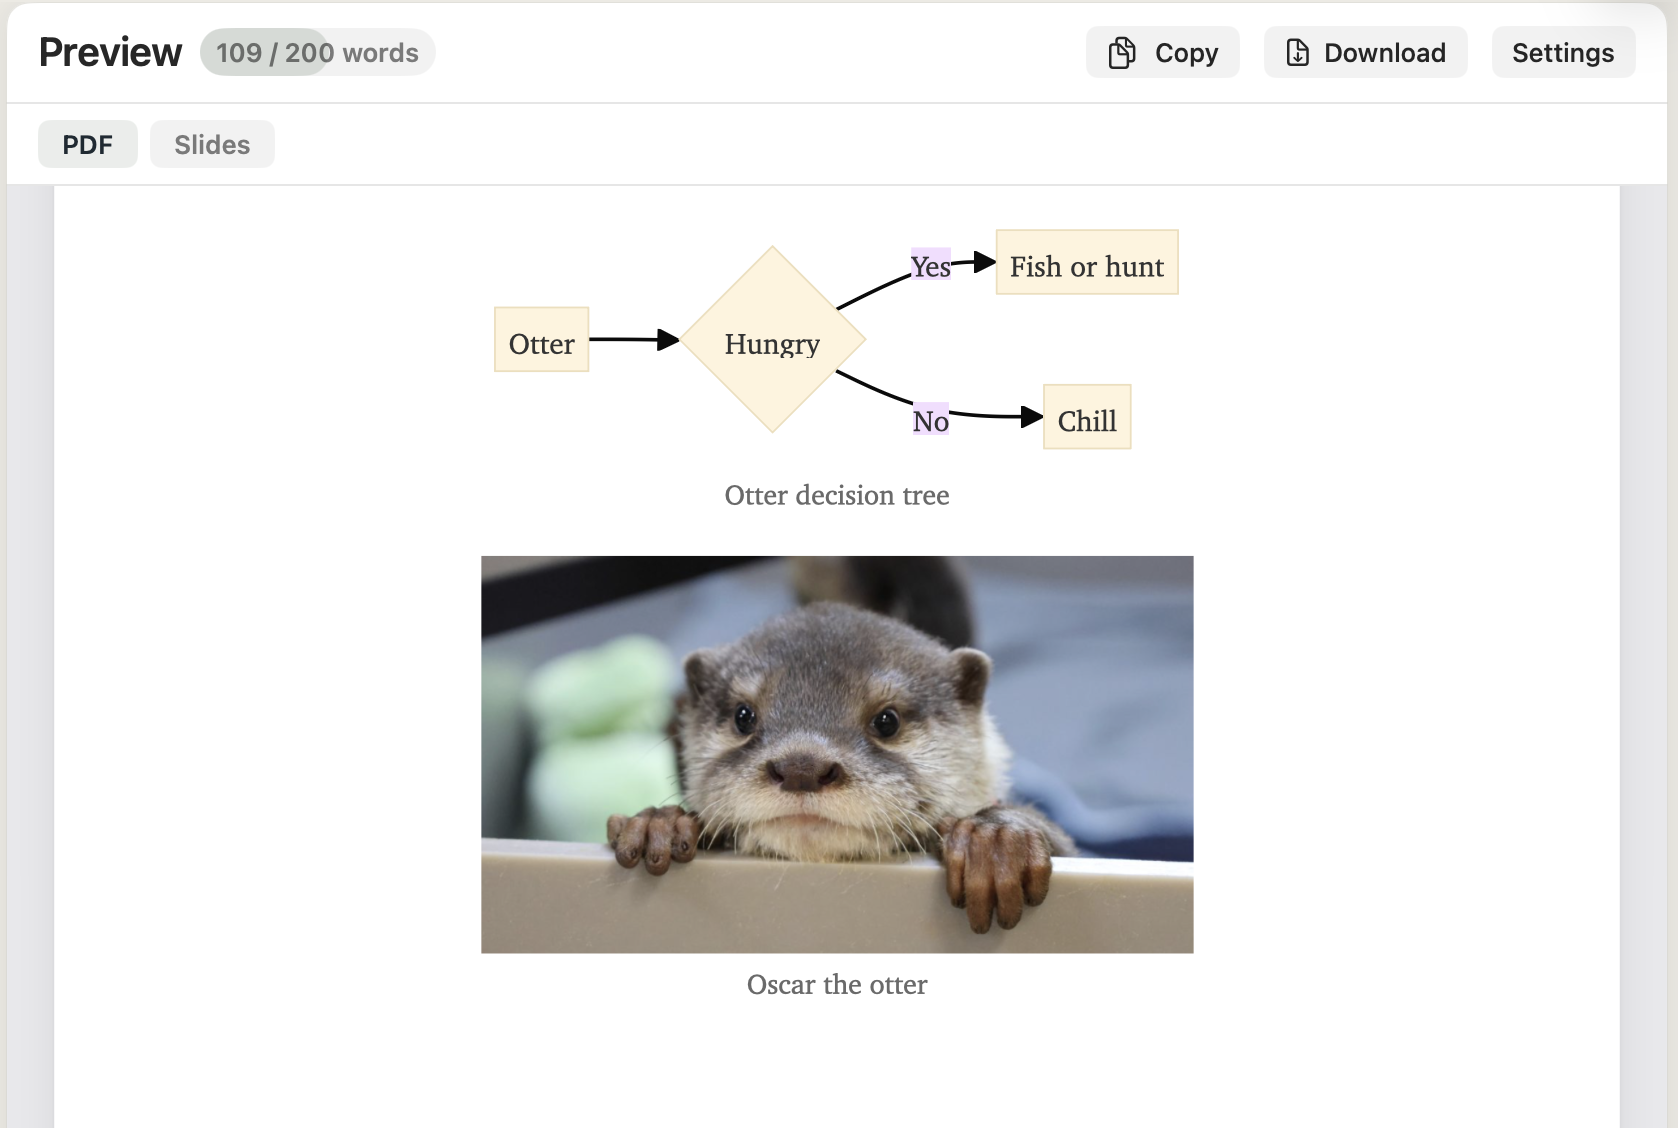
/imageimages/ folder. Set width, alignment (centred or left), caption, and crop. Drag-in works too — the file is copied into images/ automatically./table… button opens customisation (alignment, width, caption, zebra-striping, header visibility)./math/diagram/checklist- [ ]). Tickable in the preview; renders as boxes in the PDF./linkhttps:// if you forgot the scheme)./source/toc[TOC]. The preview replaces it with a generated table of contents from your headings./callout/note/helpSlash commands run only when the line contains just the command (and optional whitespace) — typing /image inside a sentence is left alone.
/image
/source
/callout renders as a styled box. Five kinds: note, tip, info, warning, danger.Notes
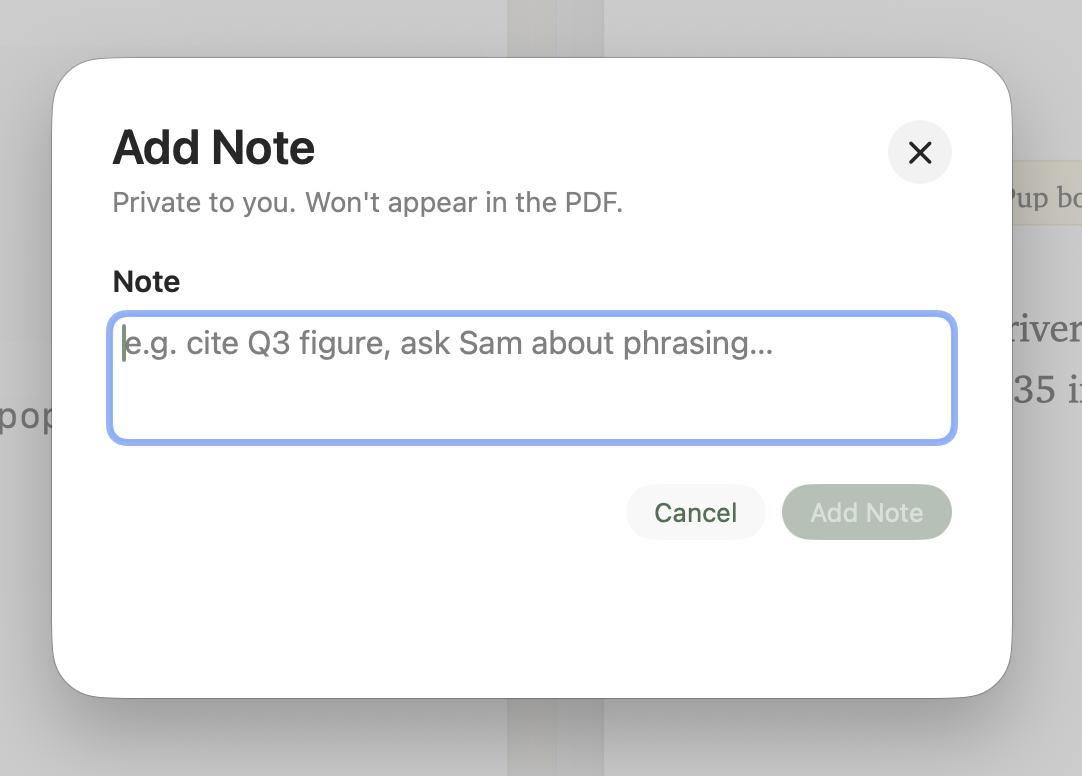
Notes are a way to leave yourself a reminder inside a document without it ever reaching the reader. Type /note, write your reminder in the sheet, hit Enter. The line is replaced with an HTML comment of the form <!-- minidocs:note … --> and rendered as a sage pill in the editor.
- Invisible to readers. HTML comments are stripped by the Markdown renderer, so notes never appear in the live preview, the PDF, the slides, or the HTML clipboard.
- Editor pill. The comment chrome (
<!-- minidocs:noteand-->) is hidden from view; only your note text shows inside a sage capsule. Click into the pill to edit. - Notes counter. The editor header shows a small chip — 3 notes — when you have any. Click it for a popover listing every note in the document.
- Jump & resolve. Each row in the popover has an arrow (jump the editor to that line) and a check (remove the note from the source).
- Portable. Notes are plain HTML comments in the Markdown file. Open the file in any other editor and you'll see
<!-- minidocs:note … -->directly — no proprietary metadata.
/note sheet — one field, hit Enter to drop the note in.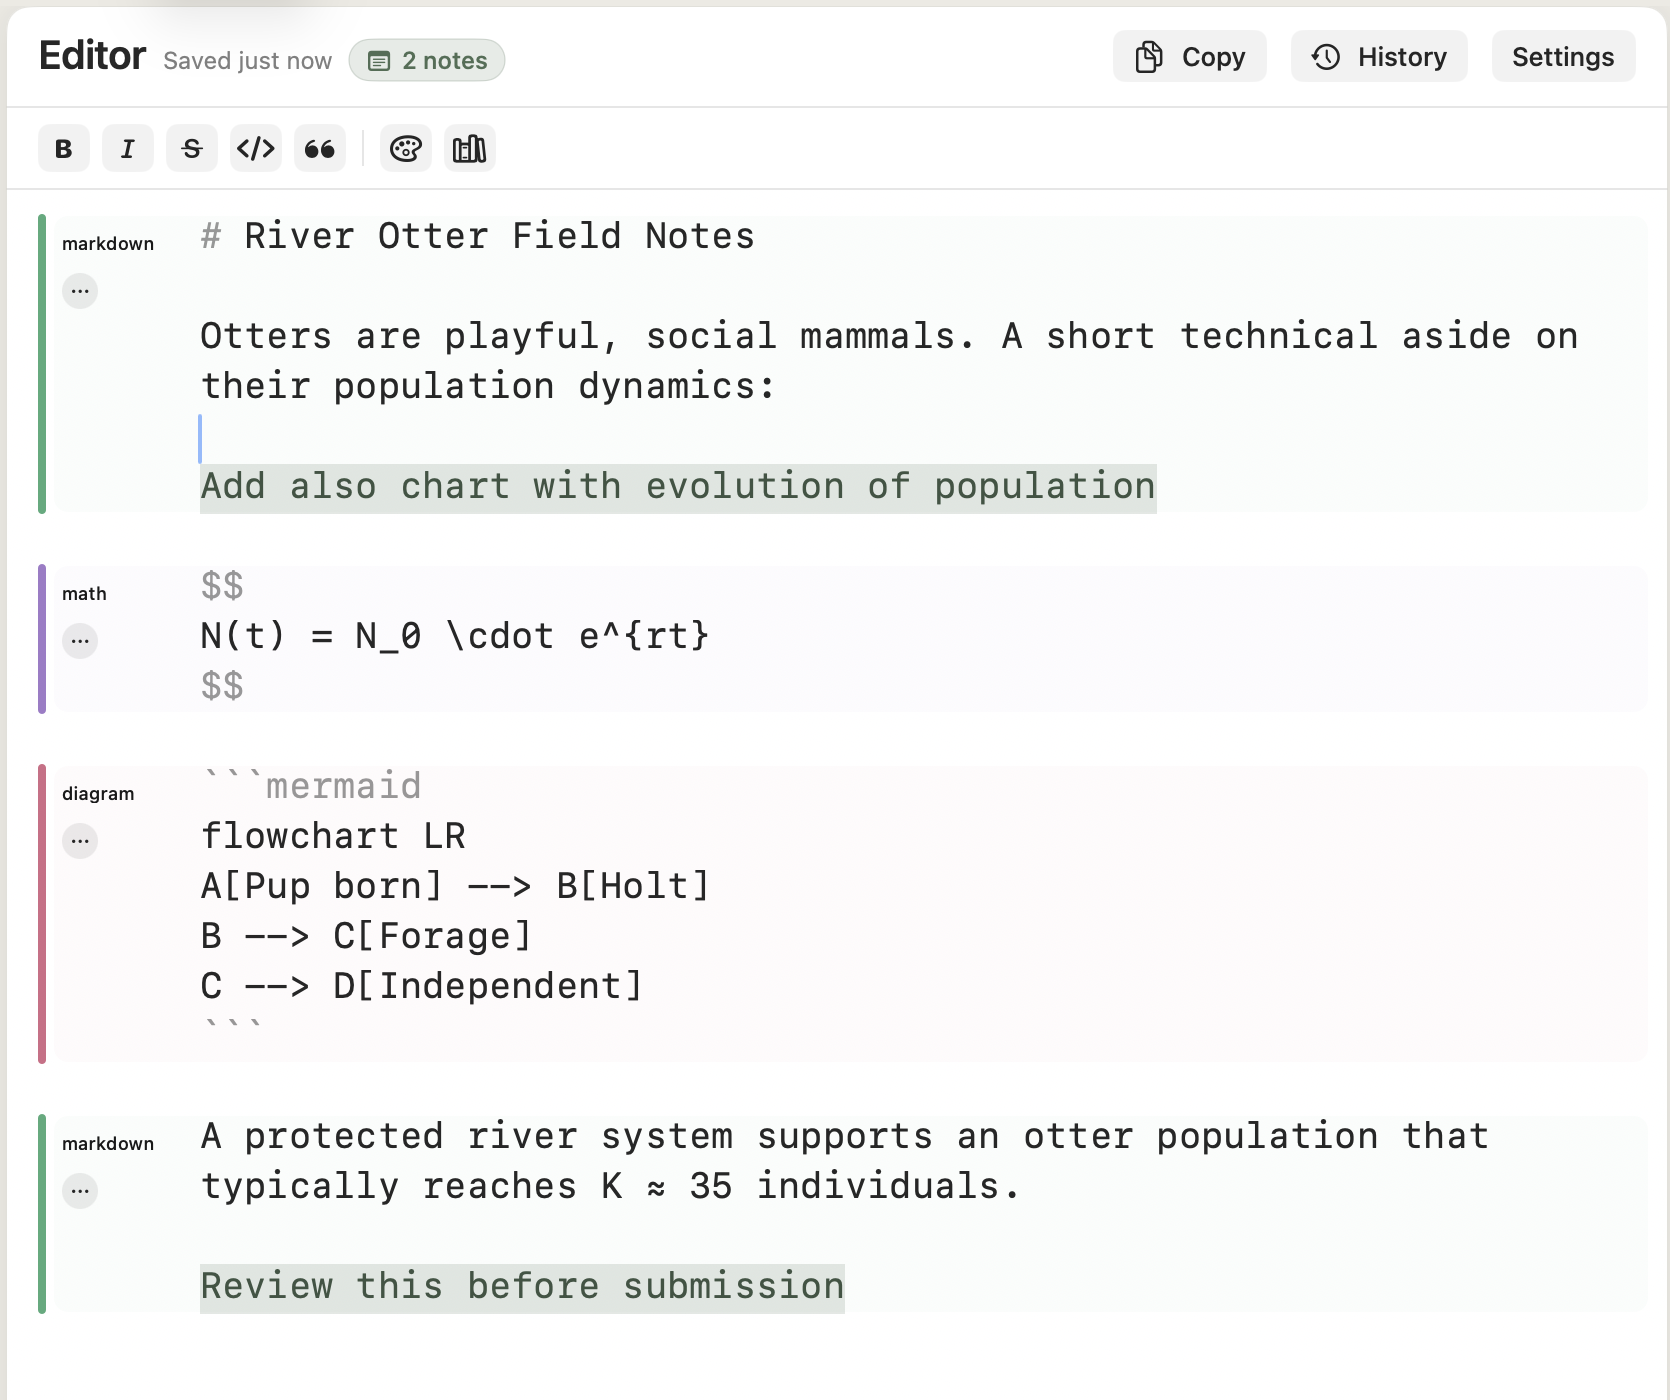
In the editor

From the chip
Drafting with AI
Hand this prompt to ChatGPT, Claude, or Gemini, describe your topic, and paste the Markdown straight into Minidocs as a document or a slide deck.
You are drafting a document for Minidocs, a Mac app that turns Markdown into polished PDFs and slide decks. Output Markdown only — no preamble, no explanation, no surrounding code fence.

## Output shape

- Document (paper, report, RFC, essay, handout, PRD): one continuous flow with `#`, `##`, `###` headings.
- Slides: separate every slide with a `---` on its own line. One idea per slide. Short bullets. No walls of text.

## Markdown to use

- Standard syntax: headings, `-` and `1.` lists, `**bold**`, `*italic*`, `> blockquote`, `[link](url)`, and pipe tables with a separator row.
- Code blocks use triple backticks and a language tag, e.g. ```python.
- Inline math: `$ ... $`. Display math: `$$ ... $$` on its own lines.
- Diagrams: a fenced block tagged `mermaid`. Use `flowchart LR` for processes, `sequenceDiagram` for interactions, `gantt` for timelines.

## Minidocs extras (optional, render cleanly)

- Captioned equation: open the display block with `$$ {caption="Bayes' rule"}`.
- Inline color: `{#2F7D5C|the colored words}` — accepts any 6-digit hex.
- Citations: `[^1]` after the cited statement, with `[^1]: Author, Title, Year.` at the end.

## Style

- Open with a strong title (`# Title`) and a one-line italic subtitle.
- Clear sections, short paragraphs, real lists.
- Use a table, a Mermaid diagram, or a math block only when it earns its place.
- End with a short conclusion or call to action.

Now write a Minidocs document about: [TOPIC]
Paste the response into a new Minidocs document. Switch the preview to Slides if the model returned --- separators.
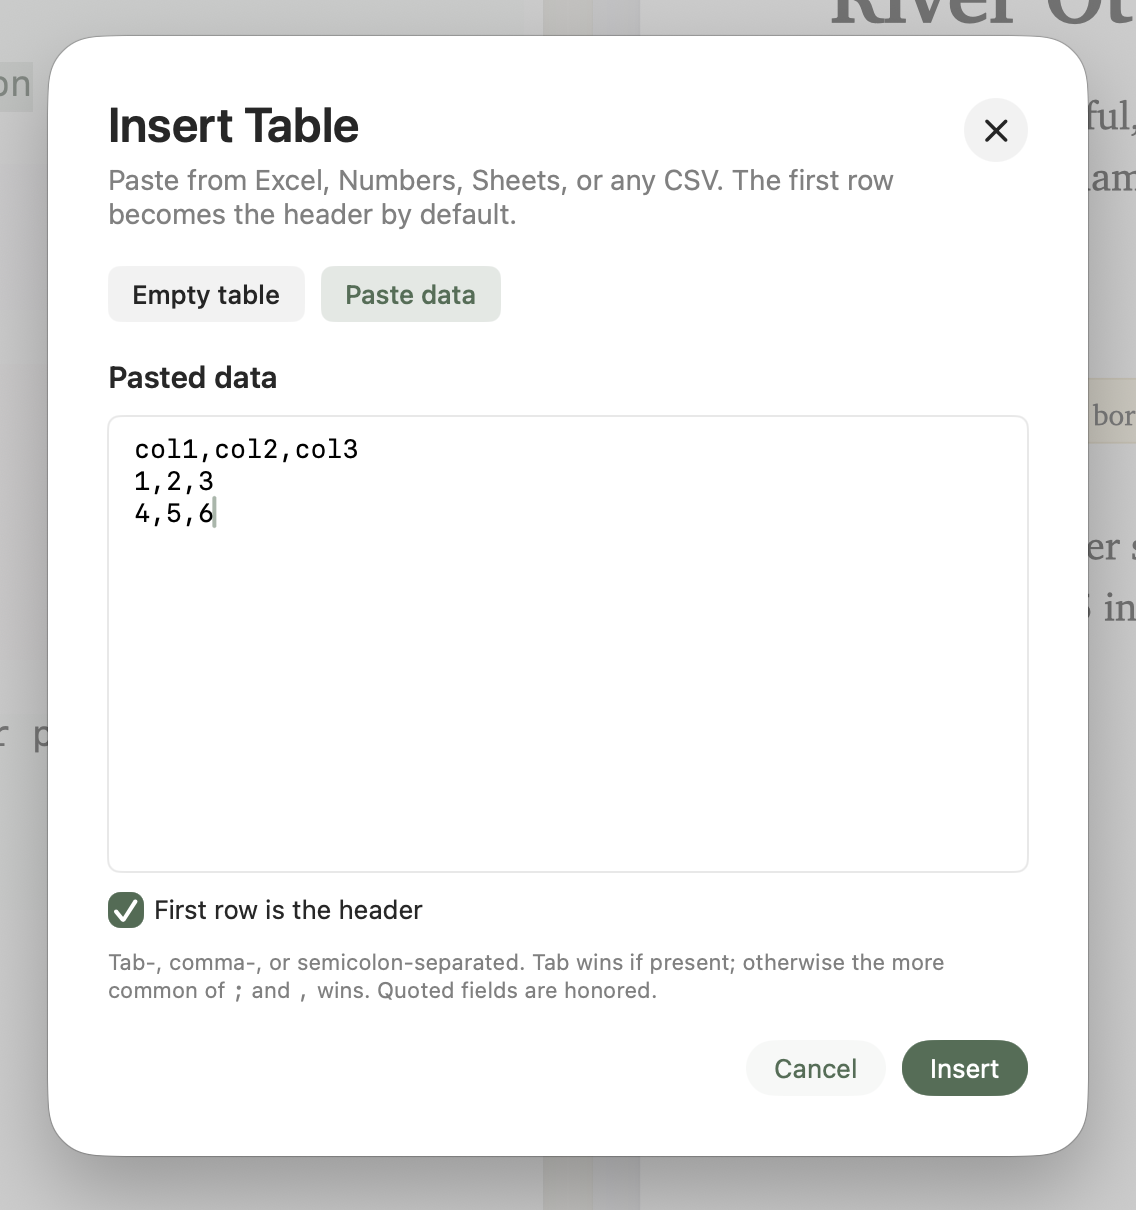
Tables
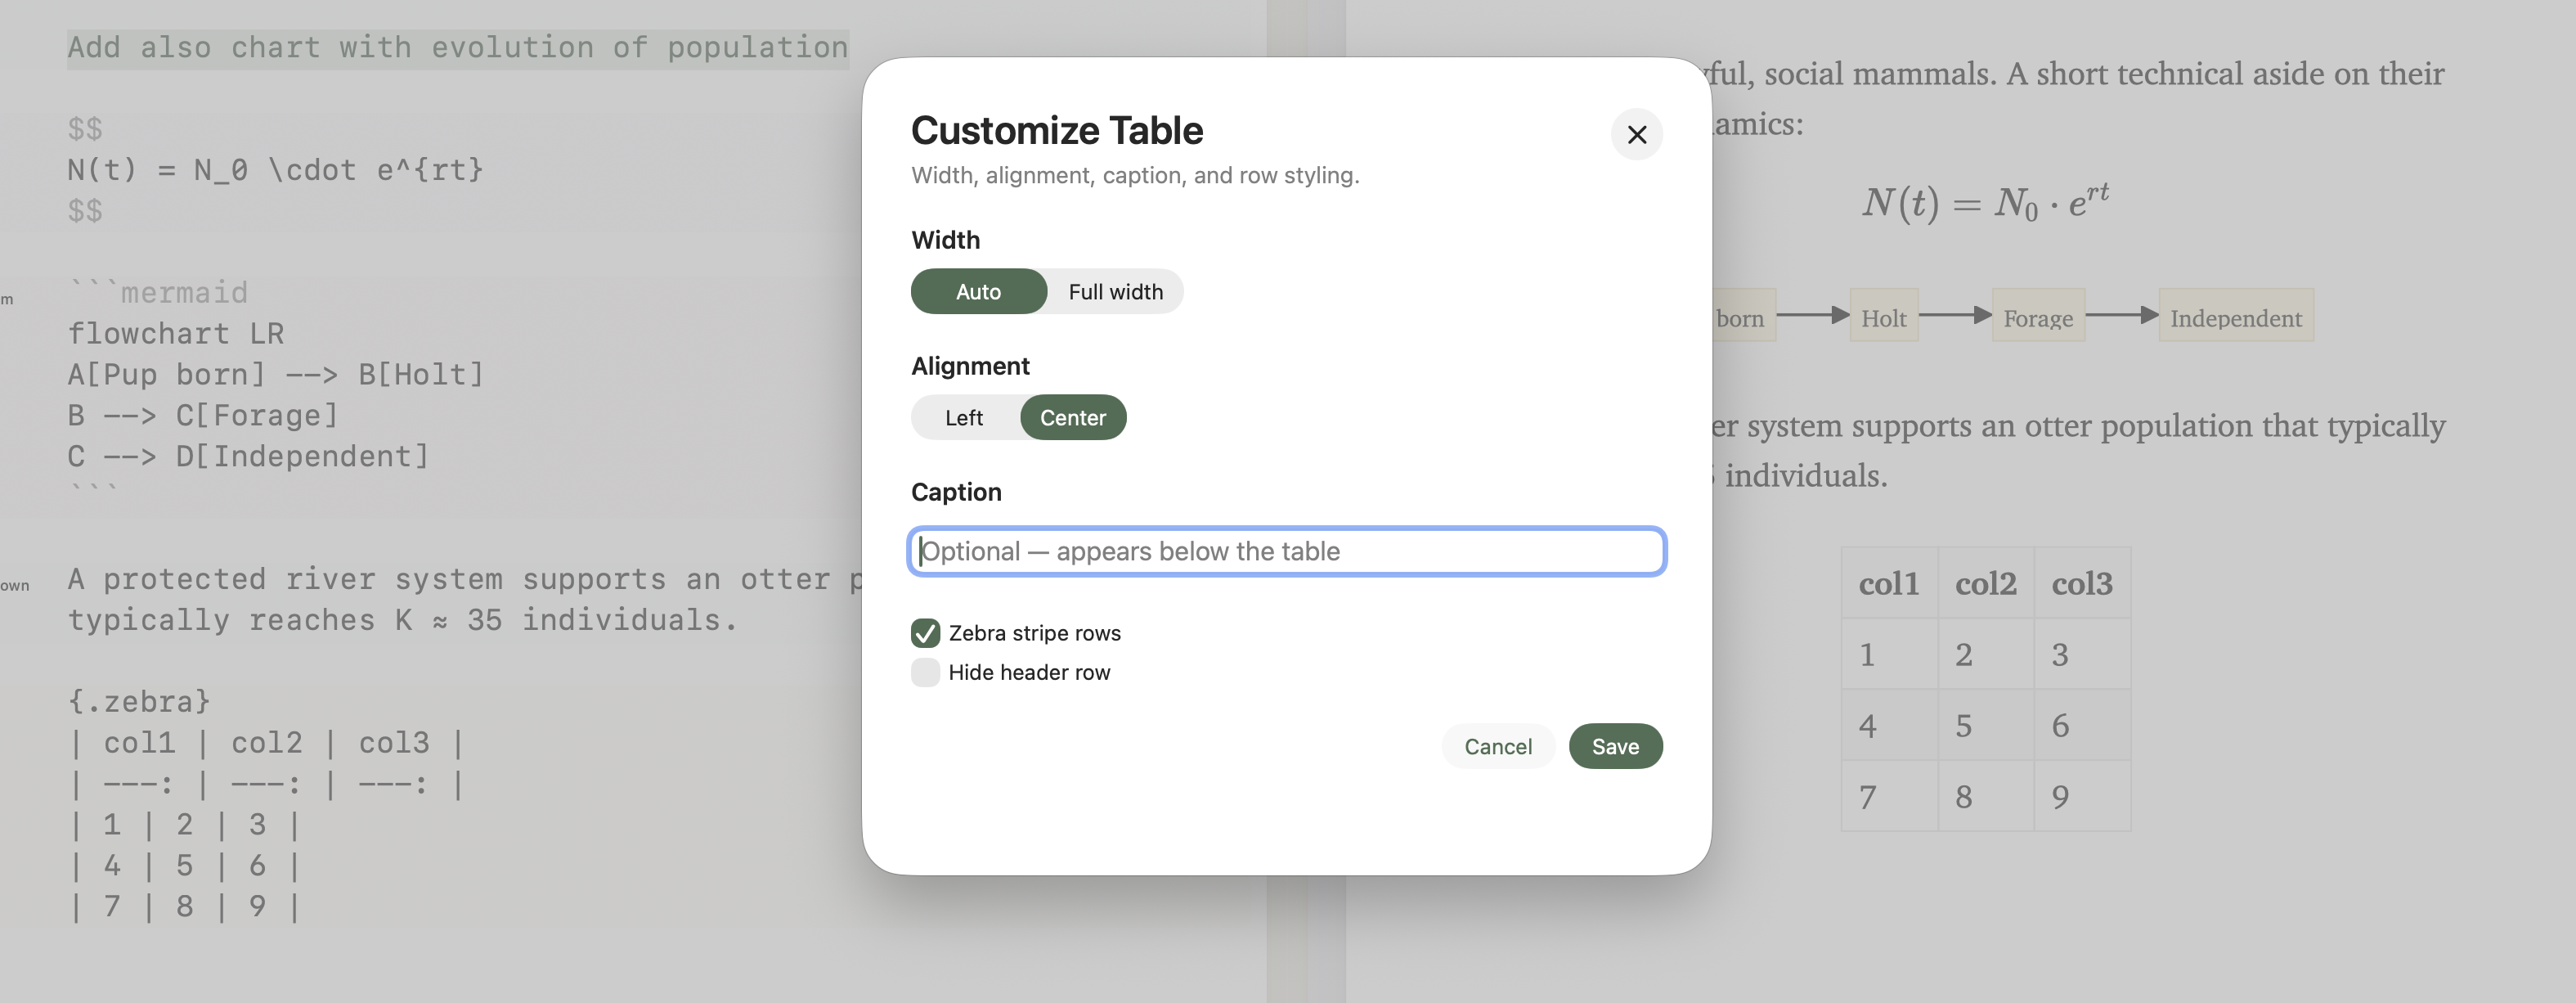
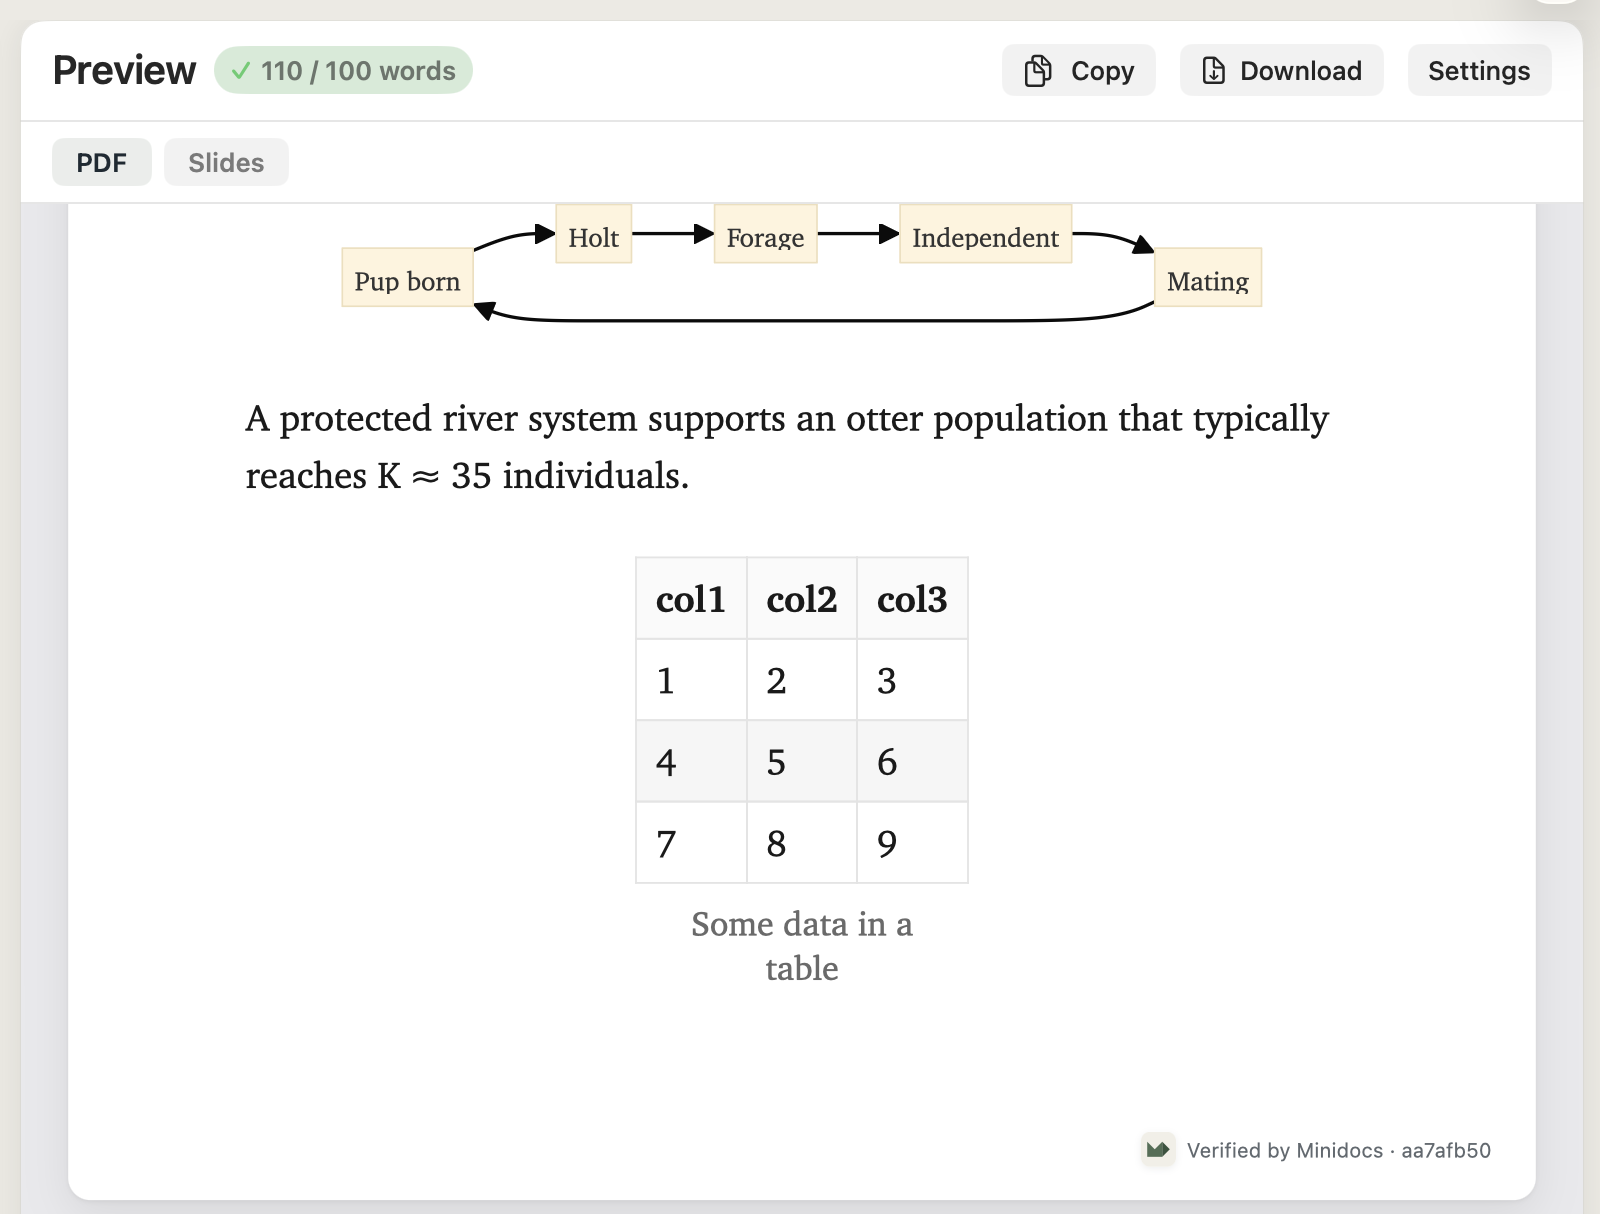
Tables come three ways: /table with a row-and-column picker, hand-typed Markdown pipes, or paste from CSV. After insertion, click the table's … button in the editor gutter to open the customisation sheet — set the table width, column alignment, caption, header visibility, and zebra-striping. Customisation is stored as a small layout directive on the table; the table itself stays standard Markdown so other tools can still read it.
/table · paste CSV
Customise
Math, code, and diagrams
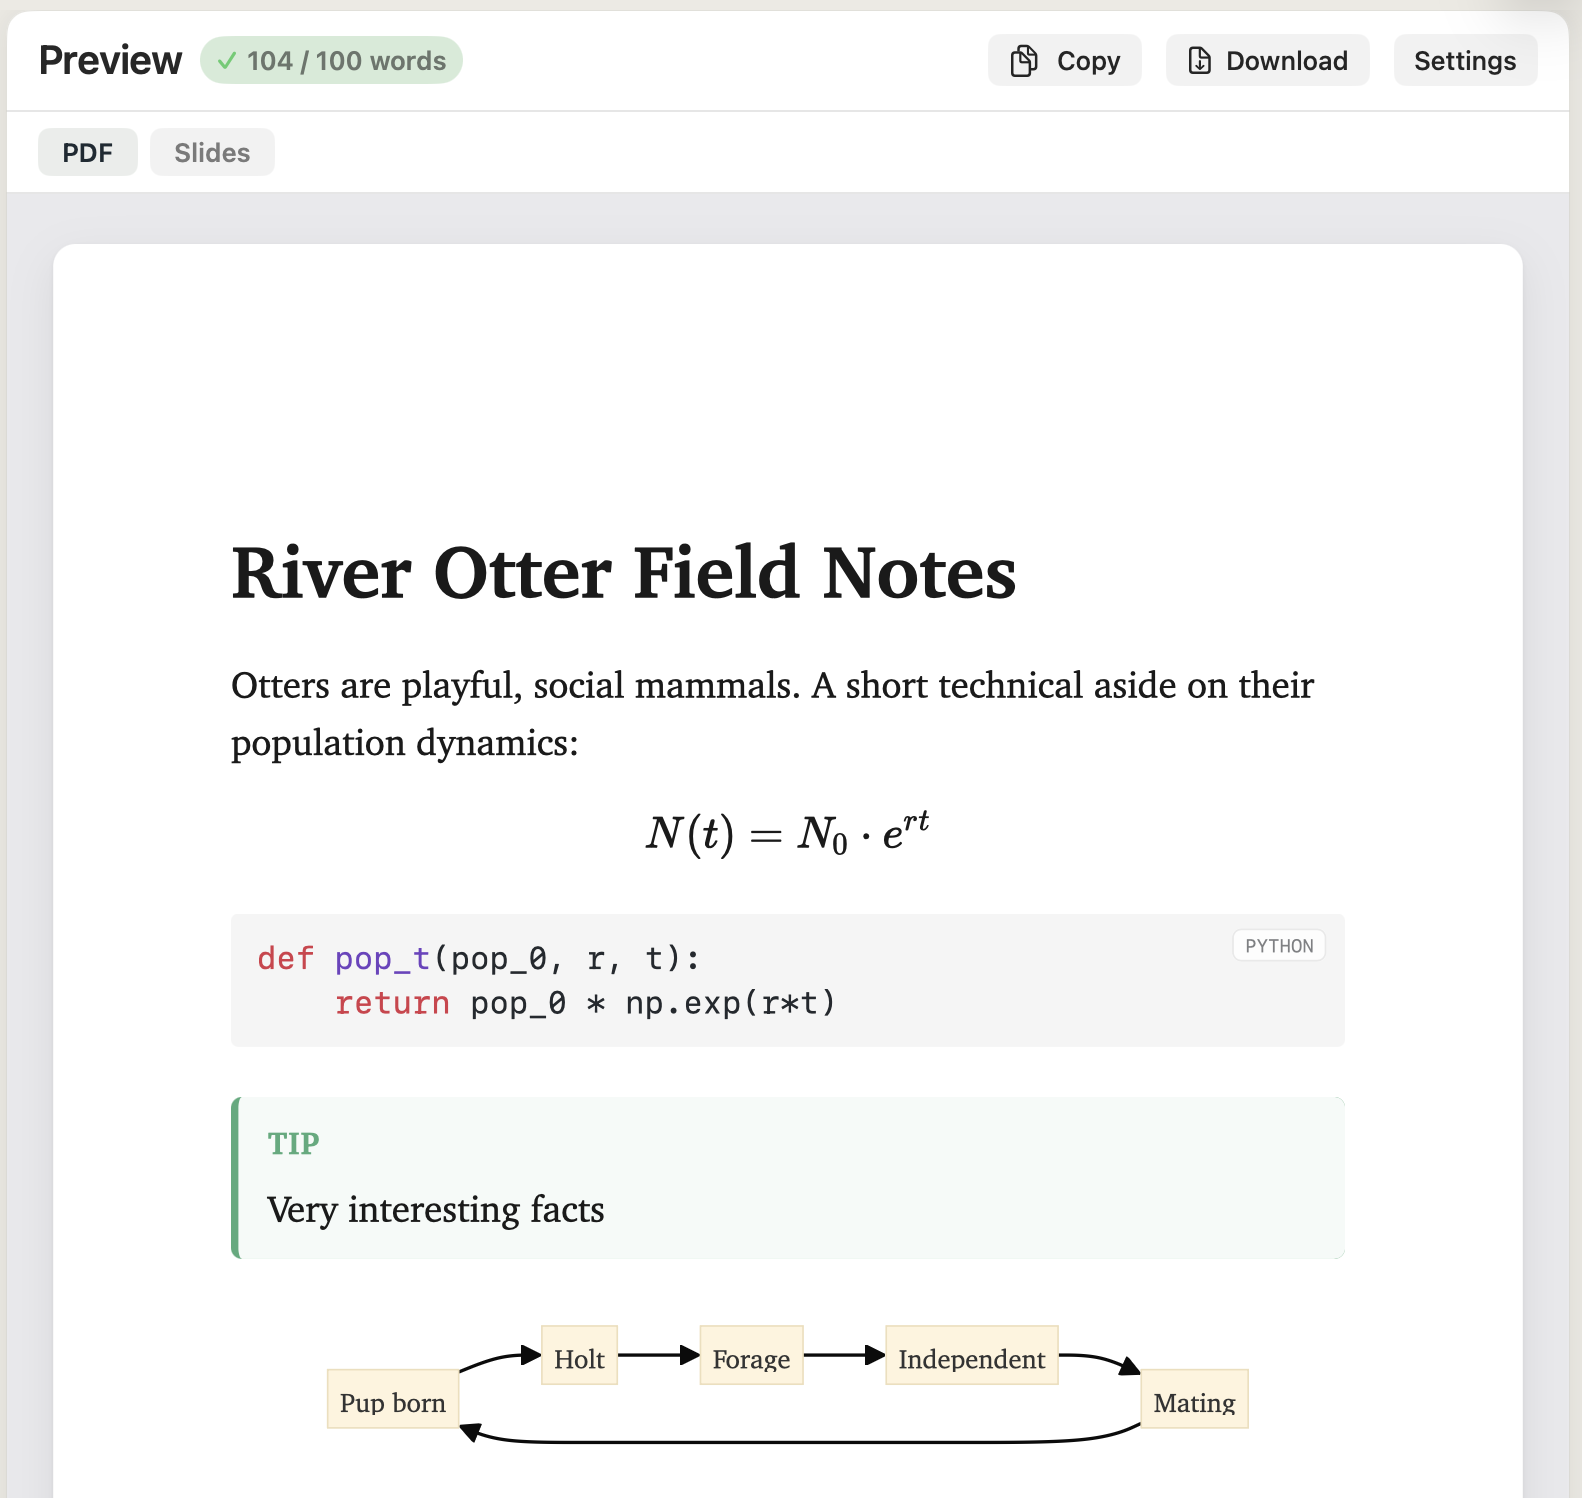
Inline math uses $ … $, display math uses $$ … $$ on its own lines. Both render with KaTeX, so equations look identical to a LaTeX paper. A display block can take a caption with the helper $$ {caption="Bayes' rule"} at the start.
Fenced code blocks (```) get syntax highlighting via highlight.js. Add a language tag — ```python, ```rust, ```sql — for accurate colours.
Mermaid diagrams use ```mermaid fences. Click the … button in the diagram's gutter to set width, caption, and background colour.
One more compact helper: {#B95D16|coloured text} renders the wrapped text in the given hex colour, including inside lists and blockquotes. The saved Markdown is exactly what you typed; any other Markdown tool can still read the file.
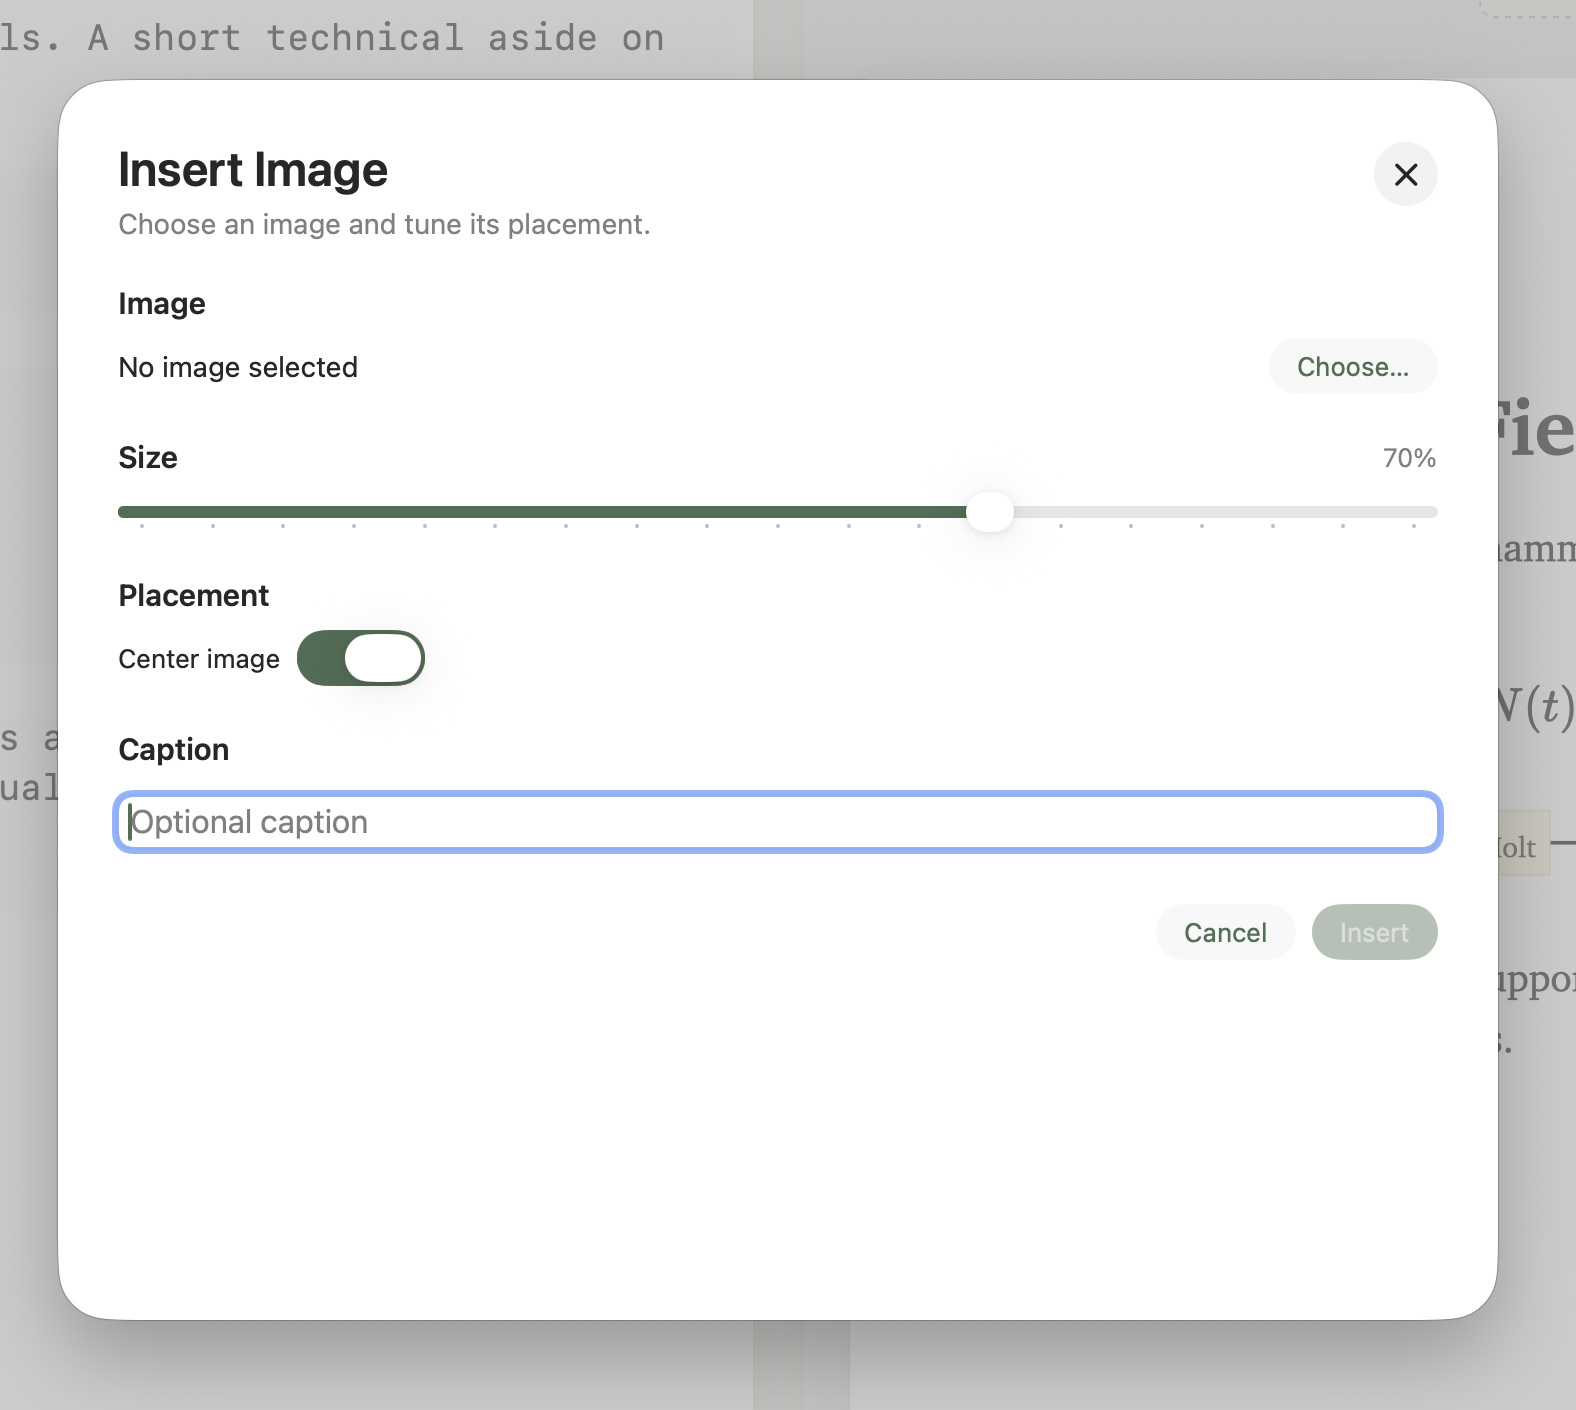
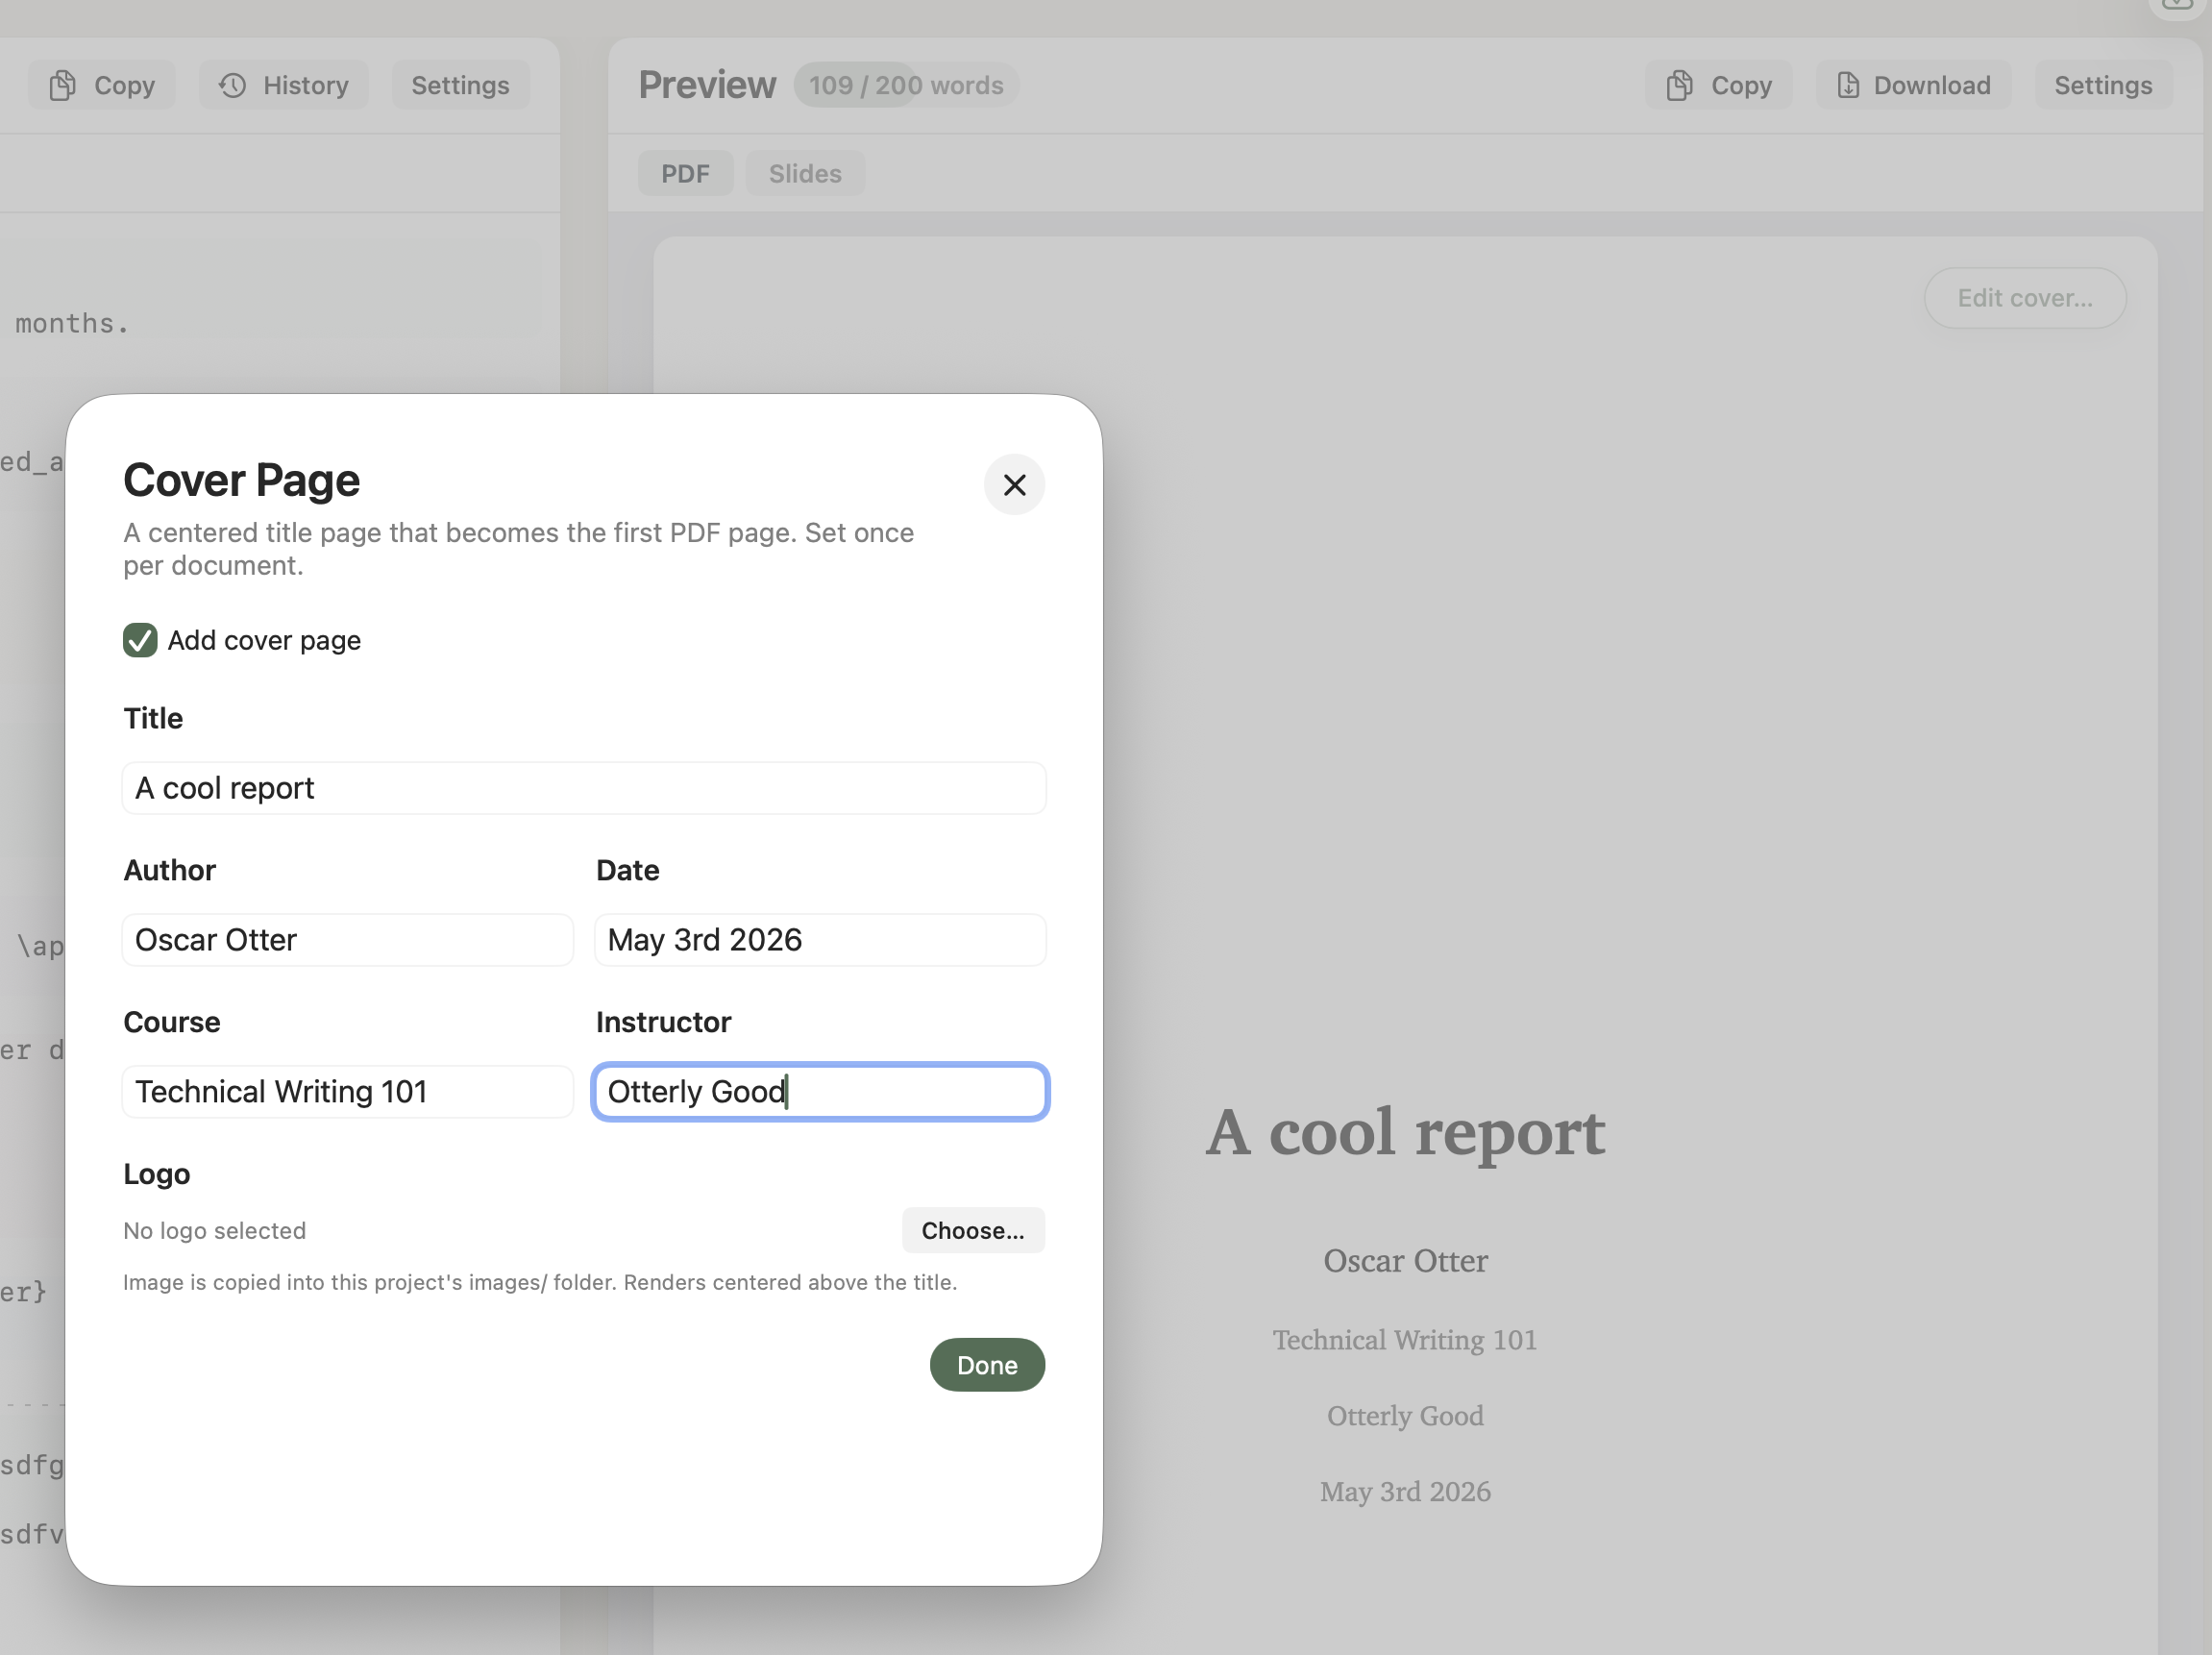
Images and assets
Each project has an images/ folder. Add files to it from the Project Explorer, or drag images directly onto the editor — Minidocs copies them in. Insert an image with /image (or  by hand). Keeping assets inside the project folder makes documents portable: zip the folder, send it, and every reference still resolves.
The /image sheet lets you set width as a percentage (so the image scales with page width), alignment (centred or left-aligned), and caption. A captioned image renders as a <figure> with a styled <figcaption> in the PDF and email exports.
<figure> in PDF and HTML exports.Cover page
The cover button in the editor toolbar (⌘⇧K) opens a sheet for setting a title, author, course, instructor, date, and an optional cover logo image. Toggle the cover on or off without losing the field values. The cover renders as the first page of the PDF and the first slide in slides mode, with margin and typography tuned to look printed.
The cover logo is project-local: Minidocs copies the chosen image into the project's images/ folder so the document stays self-contained.
Cover sheet
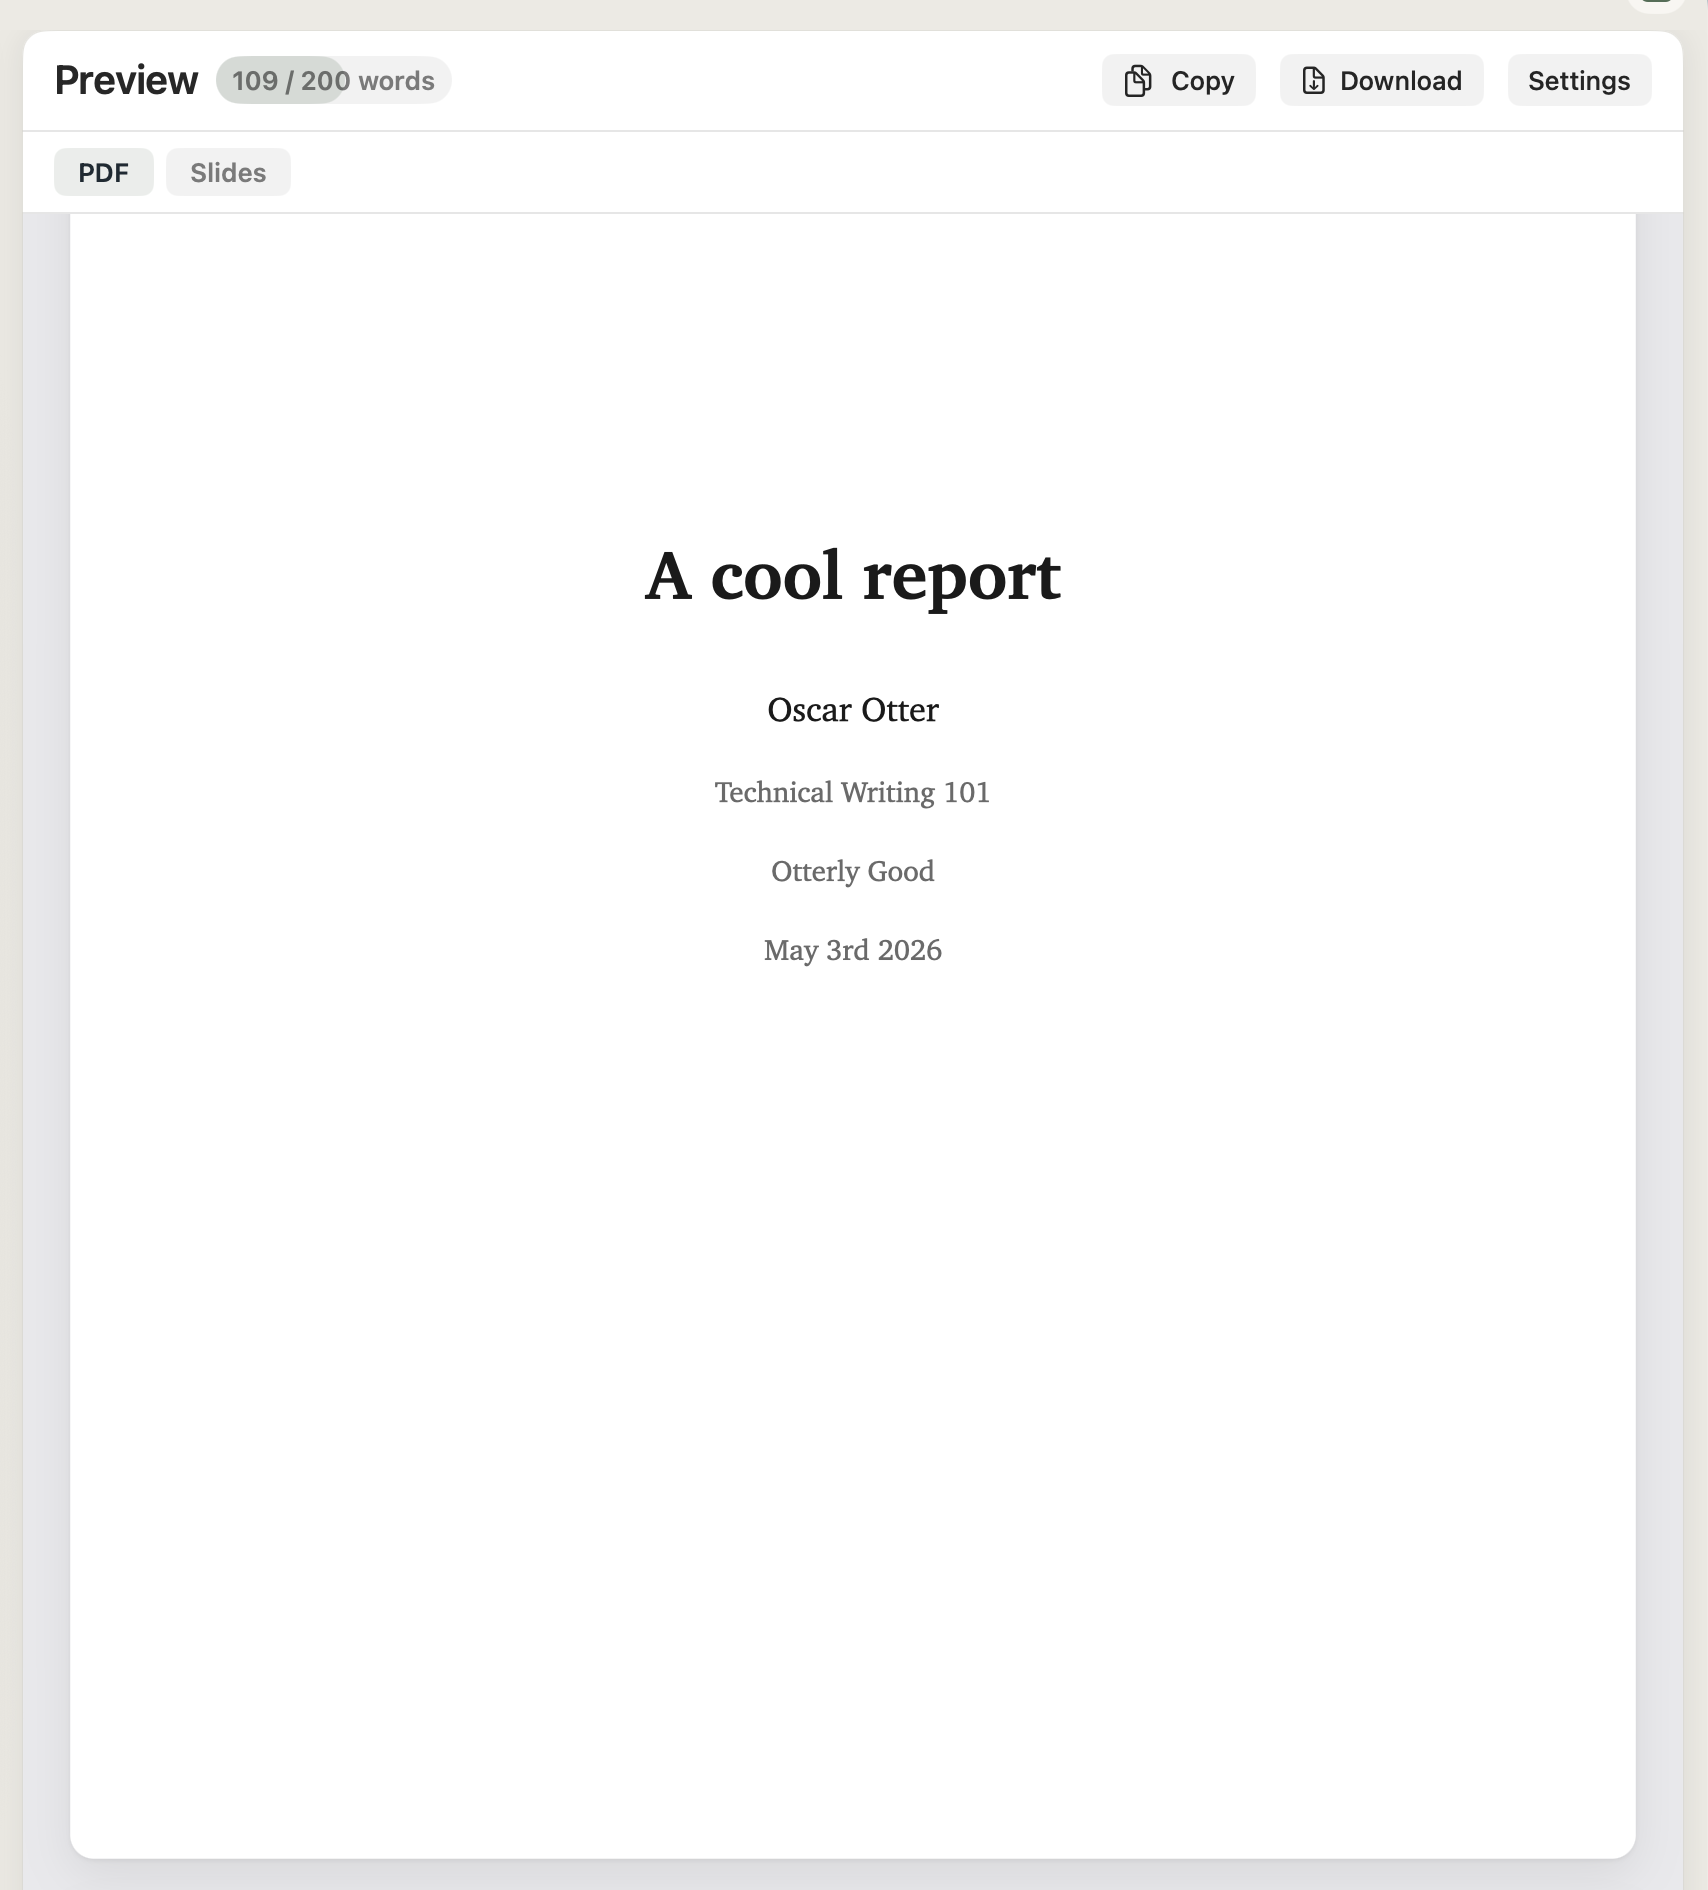
Rendered as page 1
PDF styling
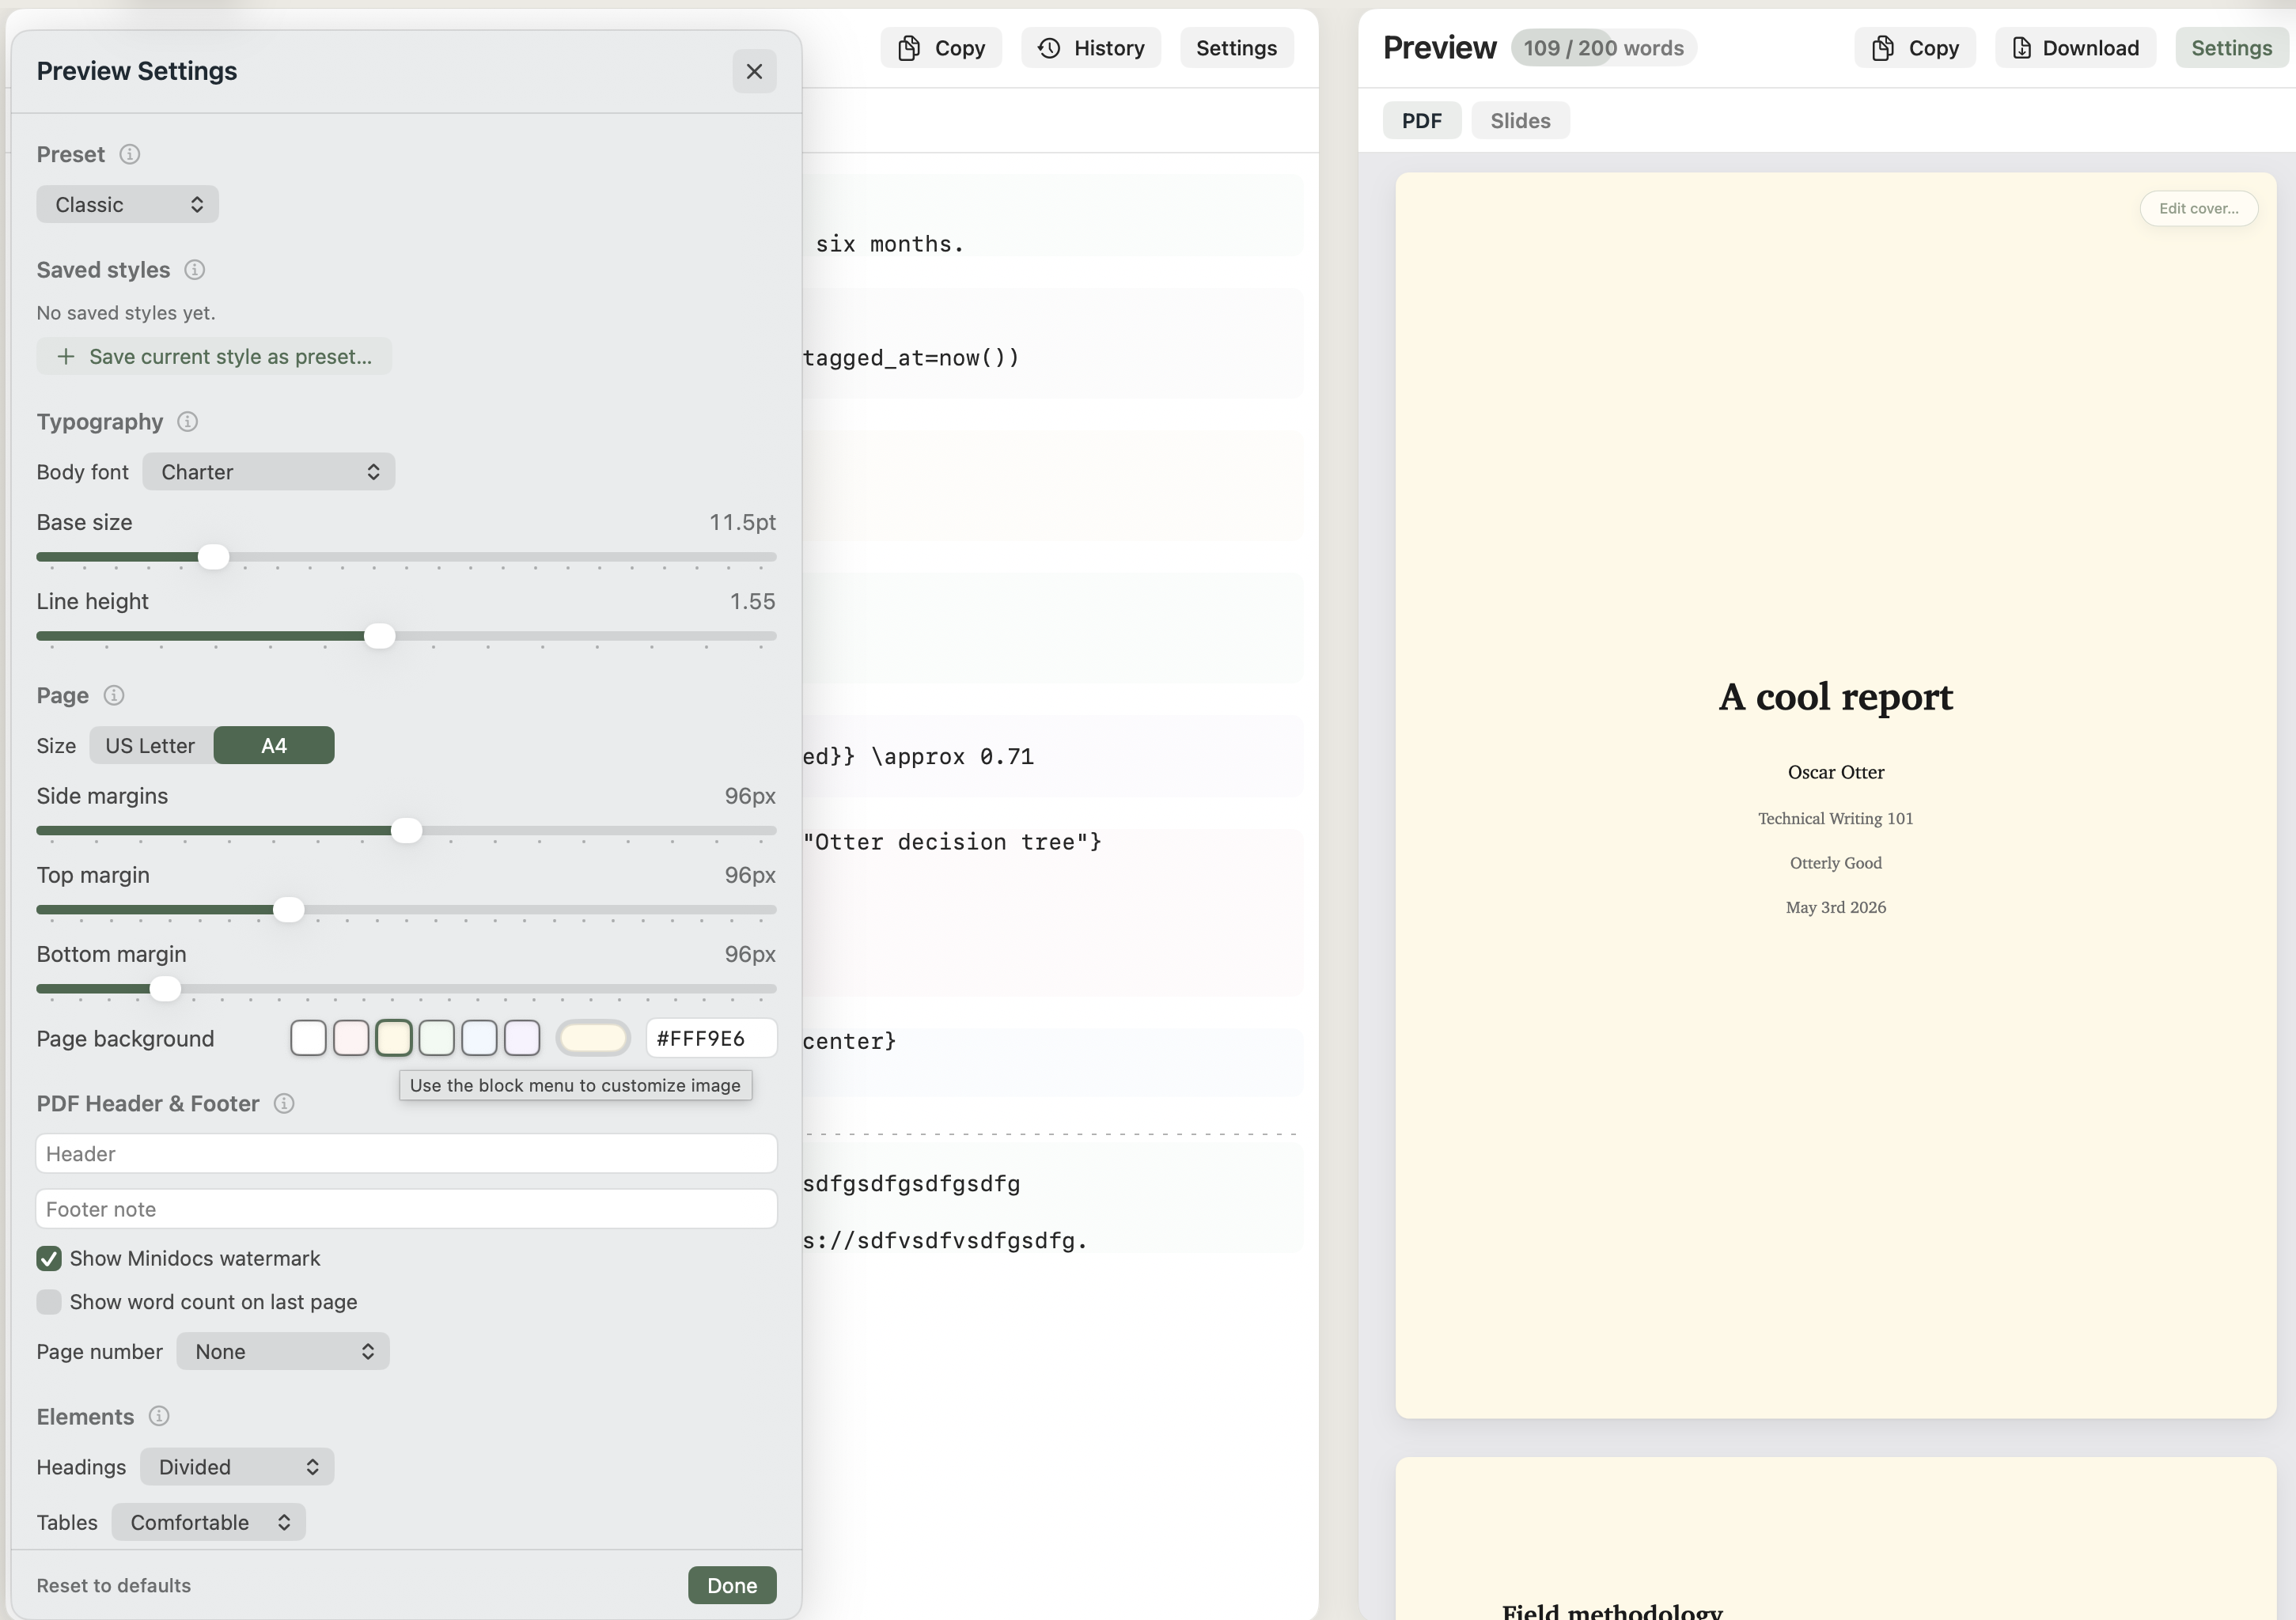
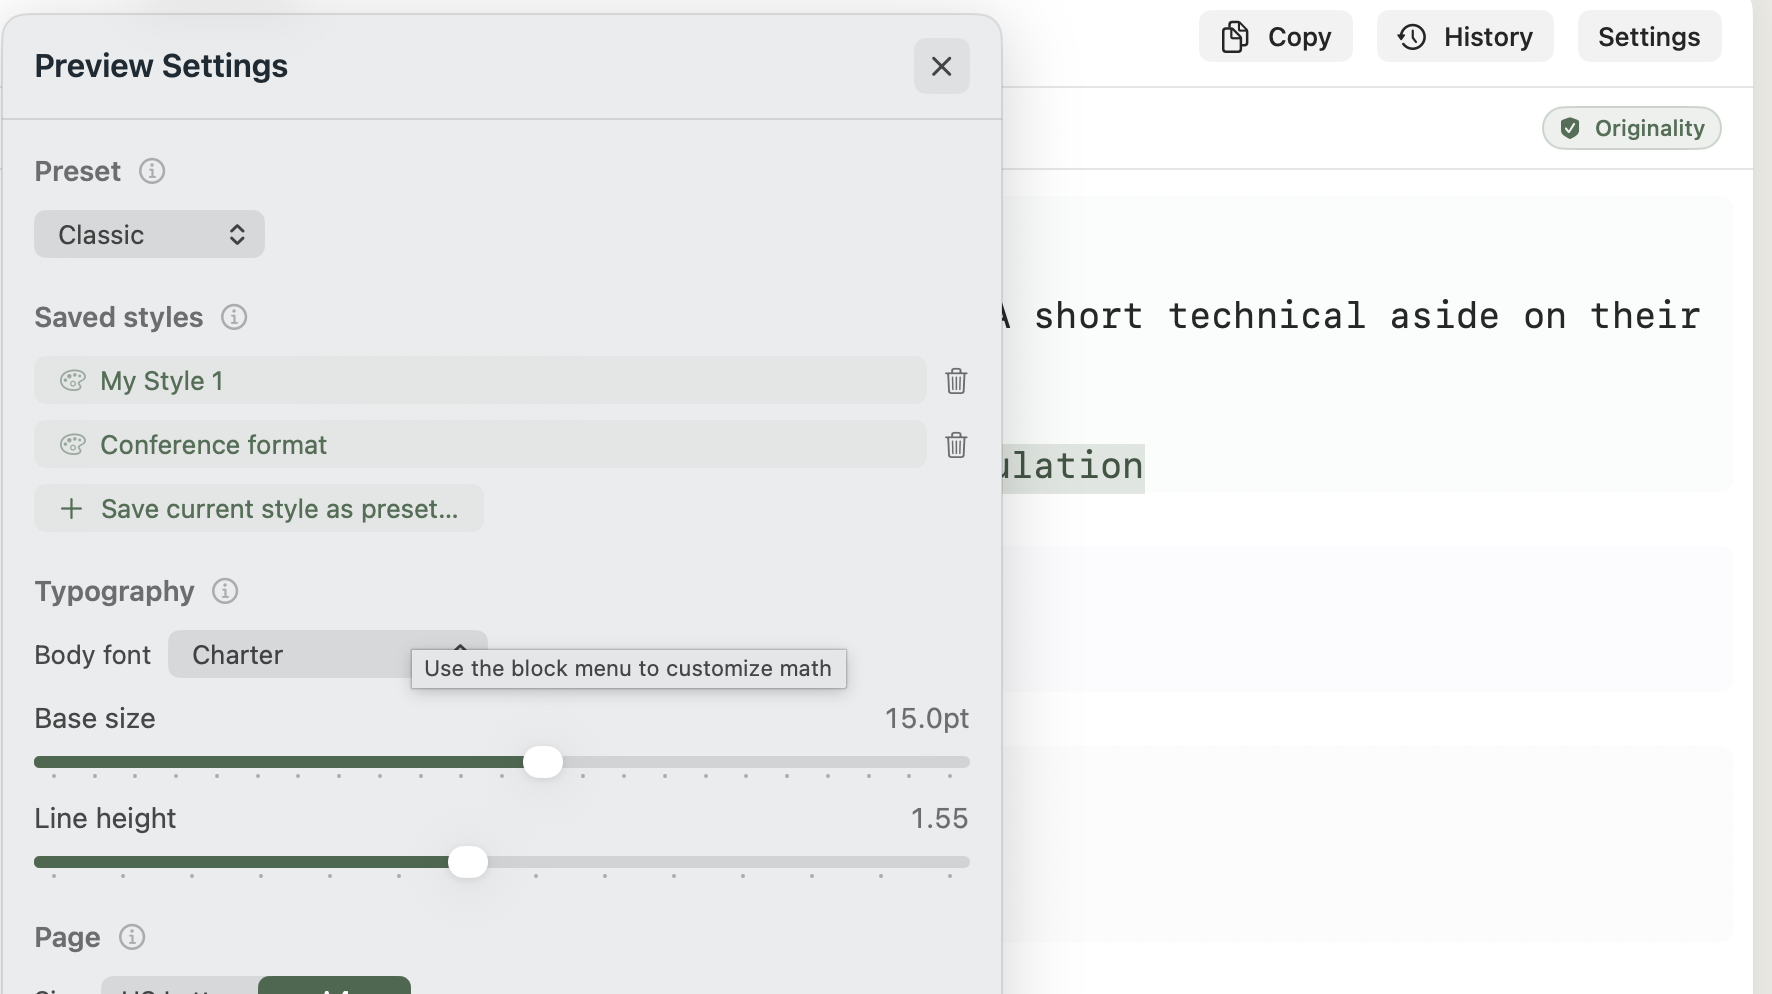
Open Preview Settings to adjust how the document looks without changing the Markdown source. Five built-in theme presets give you a starting point.
- Theme presets. Classic, Minimal, Report, Manuscript, Academic. Each preset sets typography, margins, headings, tables, and captions to a coherent look. Tune from there with the controls below.
- Typography. Pick a body font (Default, Charter, Georgia, Times New Roman, Helvetica Neue, Avenir Next, New York, SF Pro, Menlo). Set base size (9–20 pt) and line height.
- Page. Page size (A4 or US Letter), side, top, and bottom margins, and paper colour (White, Blush, Butter, Mint, Sky, Lilac, or a custom hex).
- Headings. Three styles — Understated, Divided, Bold — control how H1–H6 look.
- Tables. Density (Comfortable or Compact), default column alignment, zebra-striping toggle, caption style.
- Header & footer. Custom text strings that print on every page. Page-number style: none, single number, or Page X / Y.
- Watermark. A subtle Minidocs footer mark — toggle on or off per document.
- Word count on last page. When you set a word goal, optionally print the final count on the document's last page.
Style choices are saved per document in a small .meta.json next to the Markdown. Changing a setting updates the live preview immediately and applies to PDF export.
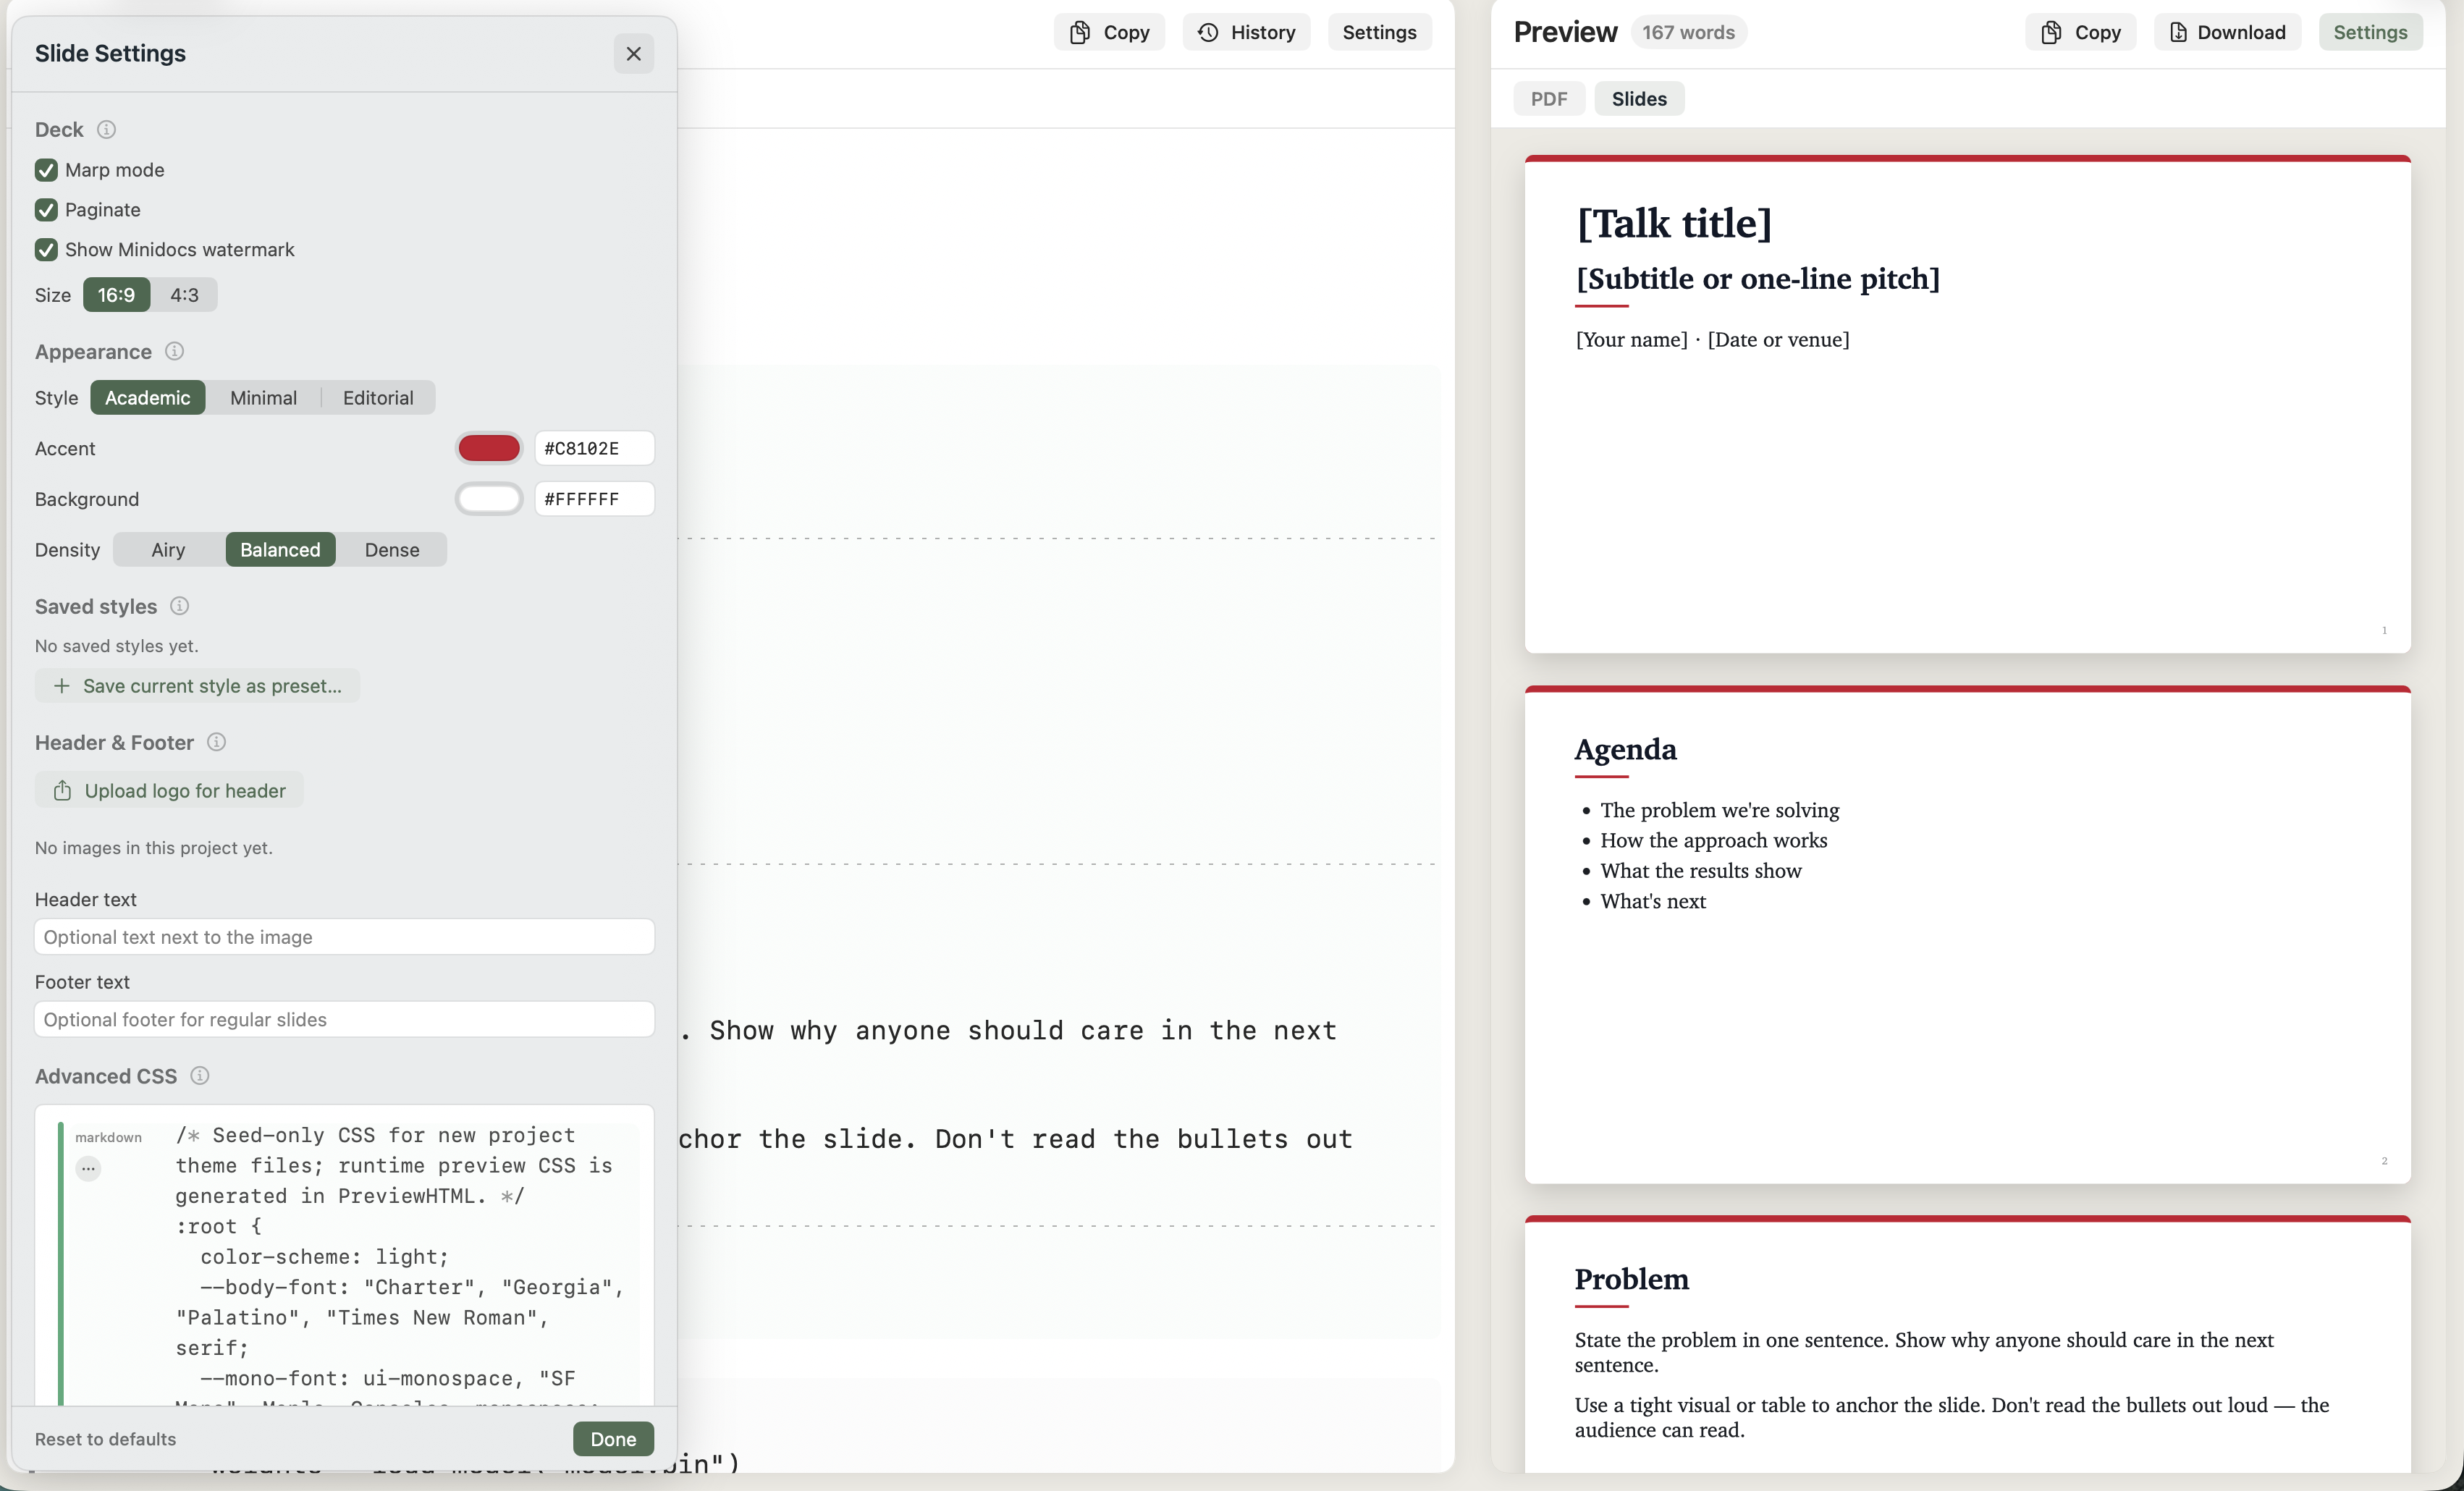
Slides
Switch the preview from PDF to Slides when the document should become a deck. The same source produces both — write once, decide what it is when you export.
- Slide breaks. A line containing only
---is a slide break (Marp-compatible). Code-fence boundaries are respected — a horizontal rule inside a fenced block stays in the slide. - Marp mode. Toggle to add Marp-compatible front matter automatically.
- Aspect. 16:9 (Widescreen) or 4:3 (Classic).
- Style preset. Academic, Minimal, or Editorial — three deck looks tuned for typical use cases.
- Accent and background. Hex pickers; defaults track the chosen style.
- Density. Airy, Balanced, or Dense controls overall typographic spacing on slides.
- Header logo and text. Upload a logo for the slide header (drops into
images/) and add a header text line. Both hide on the cover slide. - Footer. A footer string that appears on every regular slide.
- Advanced CSS. The escape hatch — write rules with
.slideselectors for deck-specific overrides. Last layer; runs after the chosen style.

Slides preview
Slide Settings
Saved style presets
Both the PDF and Slides settings panels include a Saved styles section. Tweak the look you want, hit Save current style as preset…, name it, and the preset shows up in the list. Click any preset to apply it; click the trash icon to remove it.
Presets are scoped to the project (stored in .minidocs.project.json), so they travel with the project via iCloud Drive but never leak between unrelated projects. Applying a preset never overwrites per-document content — your cover-page text, PDF header, footer, and other content fields stay put. Only the look-and-feel fields (typography, margins, accent, paper colour, etc.) move.
Templates
When you create a project (⌘N), pick a template to start with structure already in place. Four today:
- Engineering RFC. Decision document with context, options, and outcome.
- Research Paper. Abstract, methods, results, discussion. Math and figures included.
- Slide Deck. Marp deck with cover, content, code, and a diagram.
- Technical Article. Long-form post with code, math, and a diagram.
Templates are starting points — once a project is created, you can edit anything. The template body lives in your main.md; nothing about the template is locked in.

Projects, documents, storage
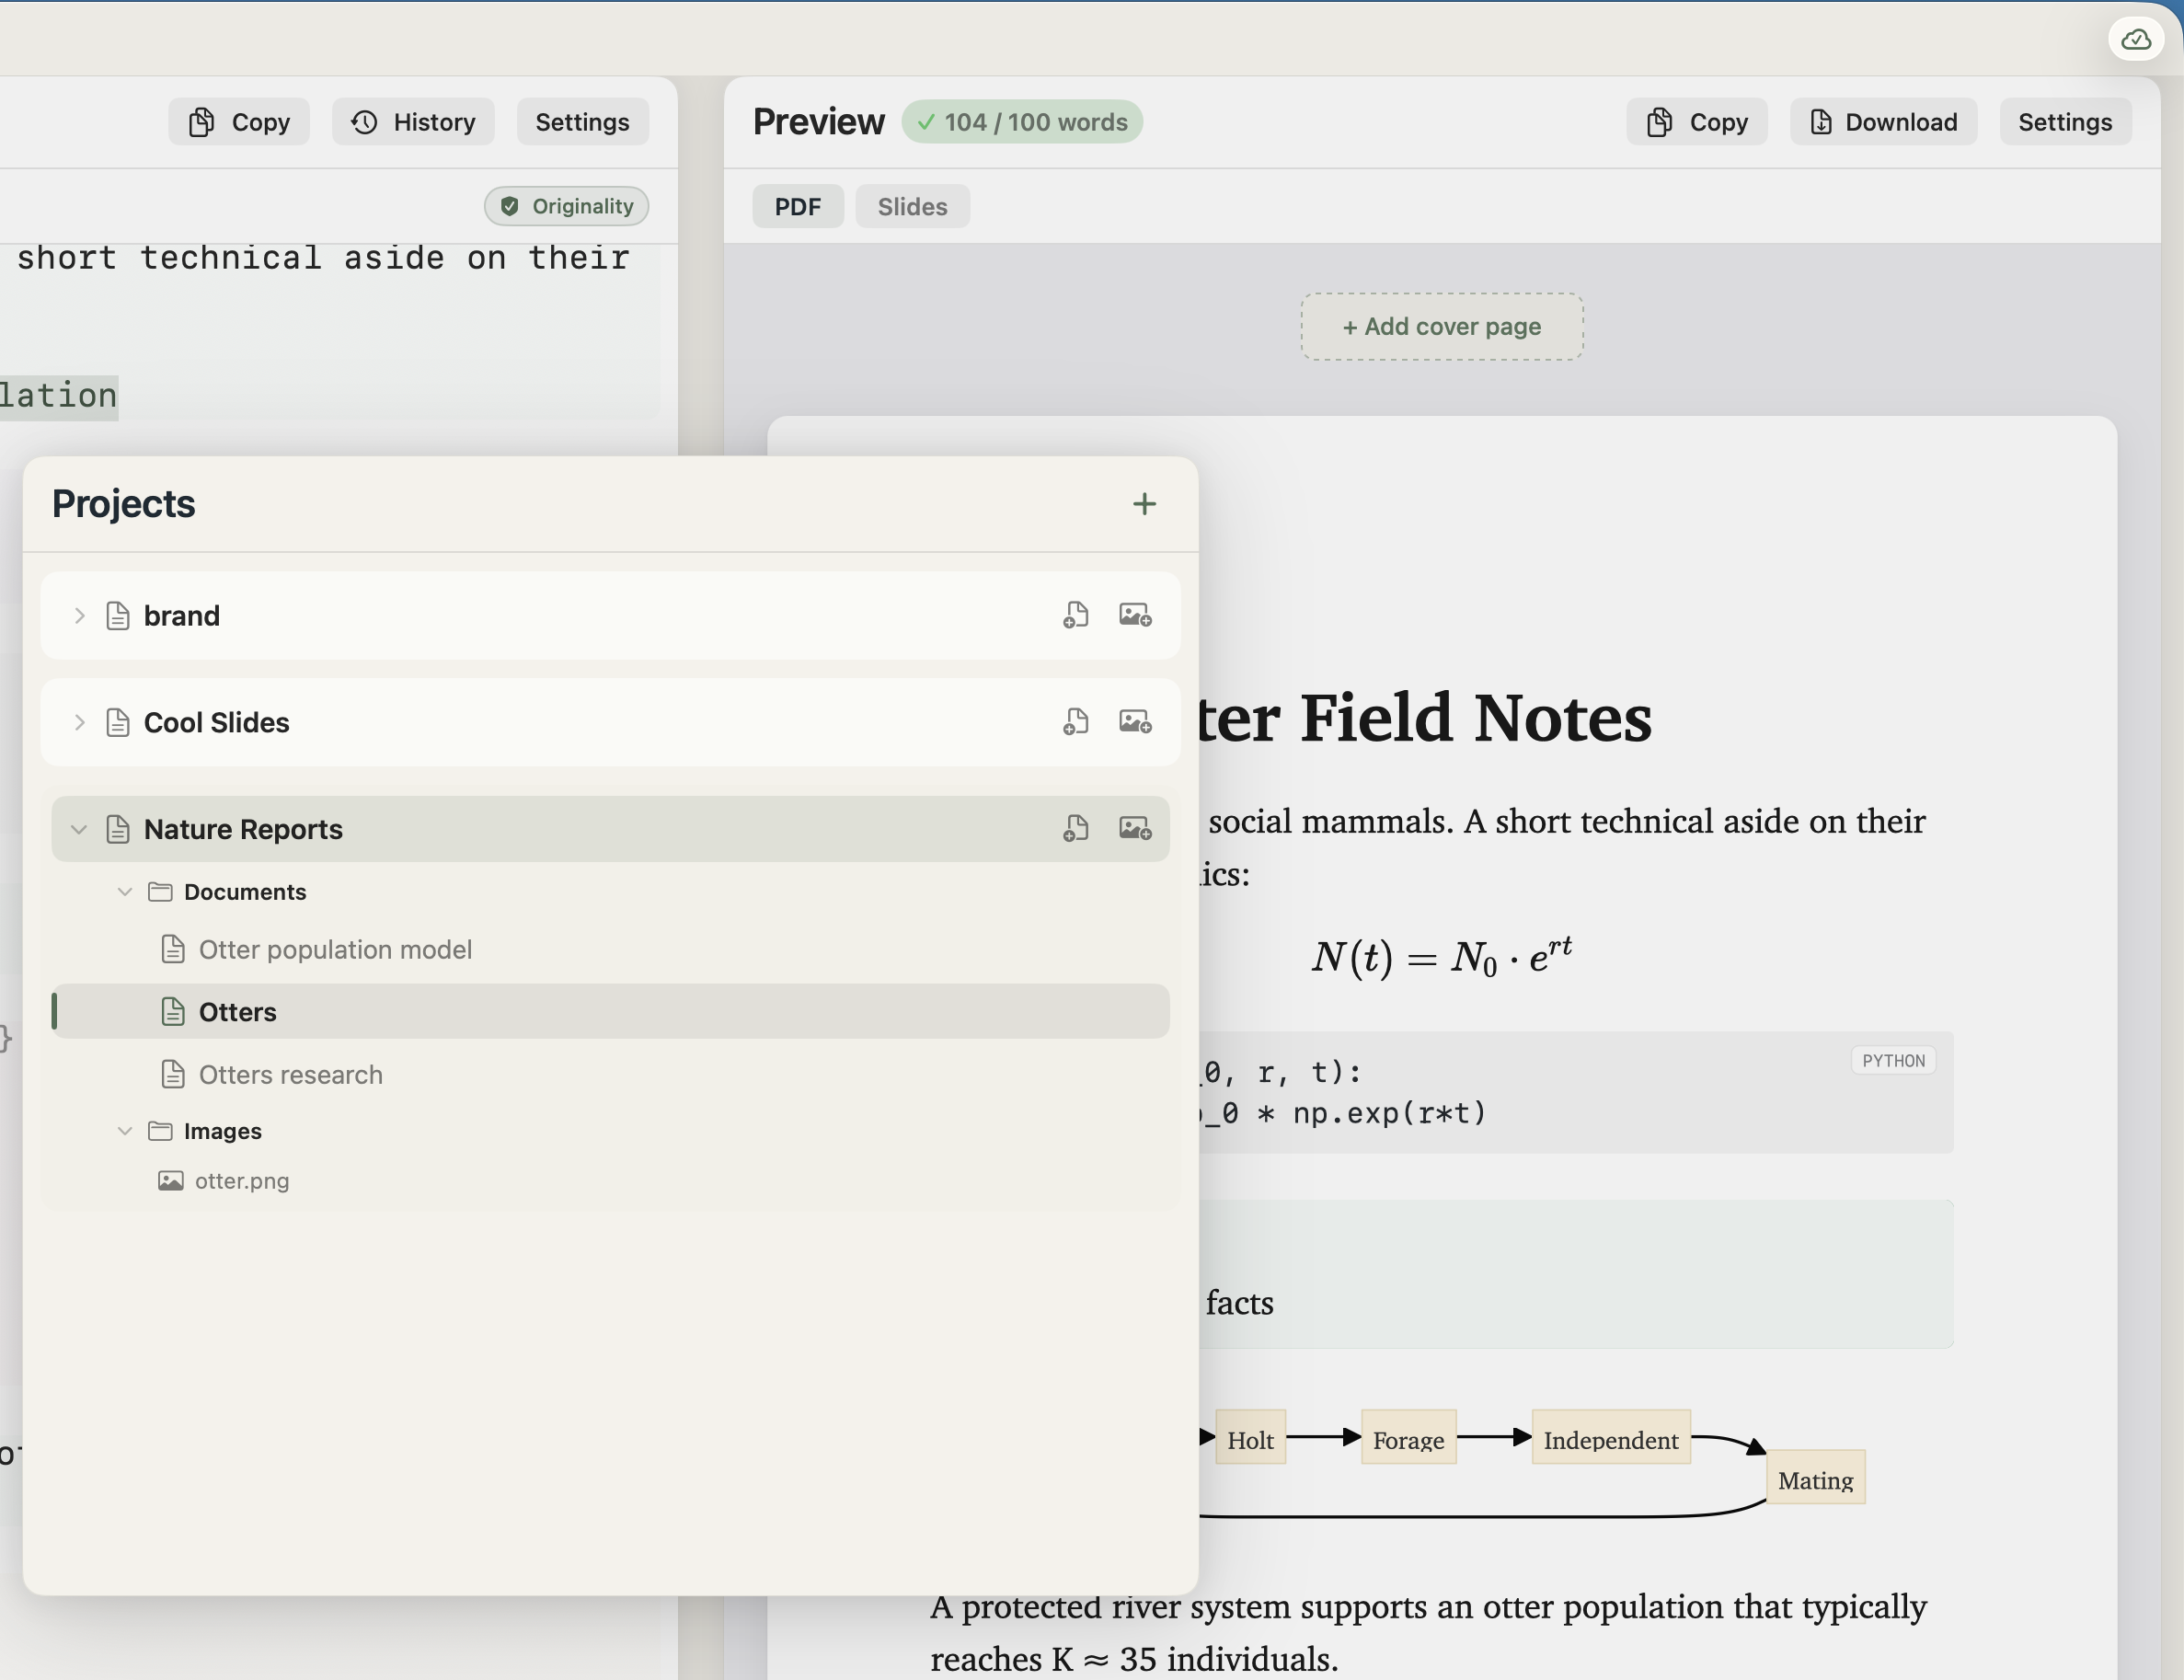
Each project is a folder on disk. Inside it: one or more Markdown documents (name.md), a per-document theme (name.theme.css), small JSON metadata (name.meta.json), an images/ folder, optional project-level settings (.minidocs.project.json), and the most recent generated .pdf. Open the project folder in Finder any time — it's just files.
Multiple documents per project. Use the Documents list inside a project for sub-files (a chapter, a draft, a one-pager). They share the project's images/ and saved style presets, but each has its own theme and meta.
Storage modes. Click the storage badge in the toolbar to switch between Auto (uses iCloud Drive when available, falls back to local) and This Mac only (keeps everything local). Switching copies your projects between locations; nothing is left behind without you confirming.
Rename, duplicate, delete. All work on the folder itself, with iCloud-aware file coordination so iCloud sync can't race the operation. Renames carry the per-document sidecar files with them.
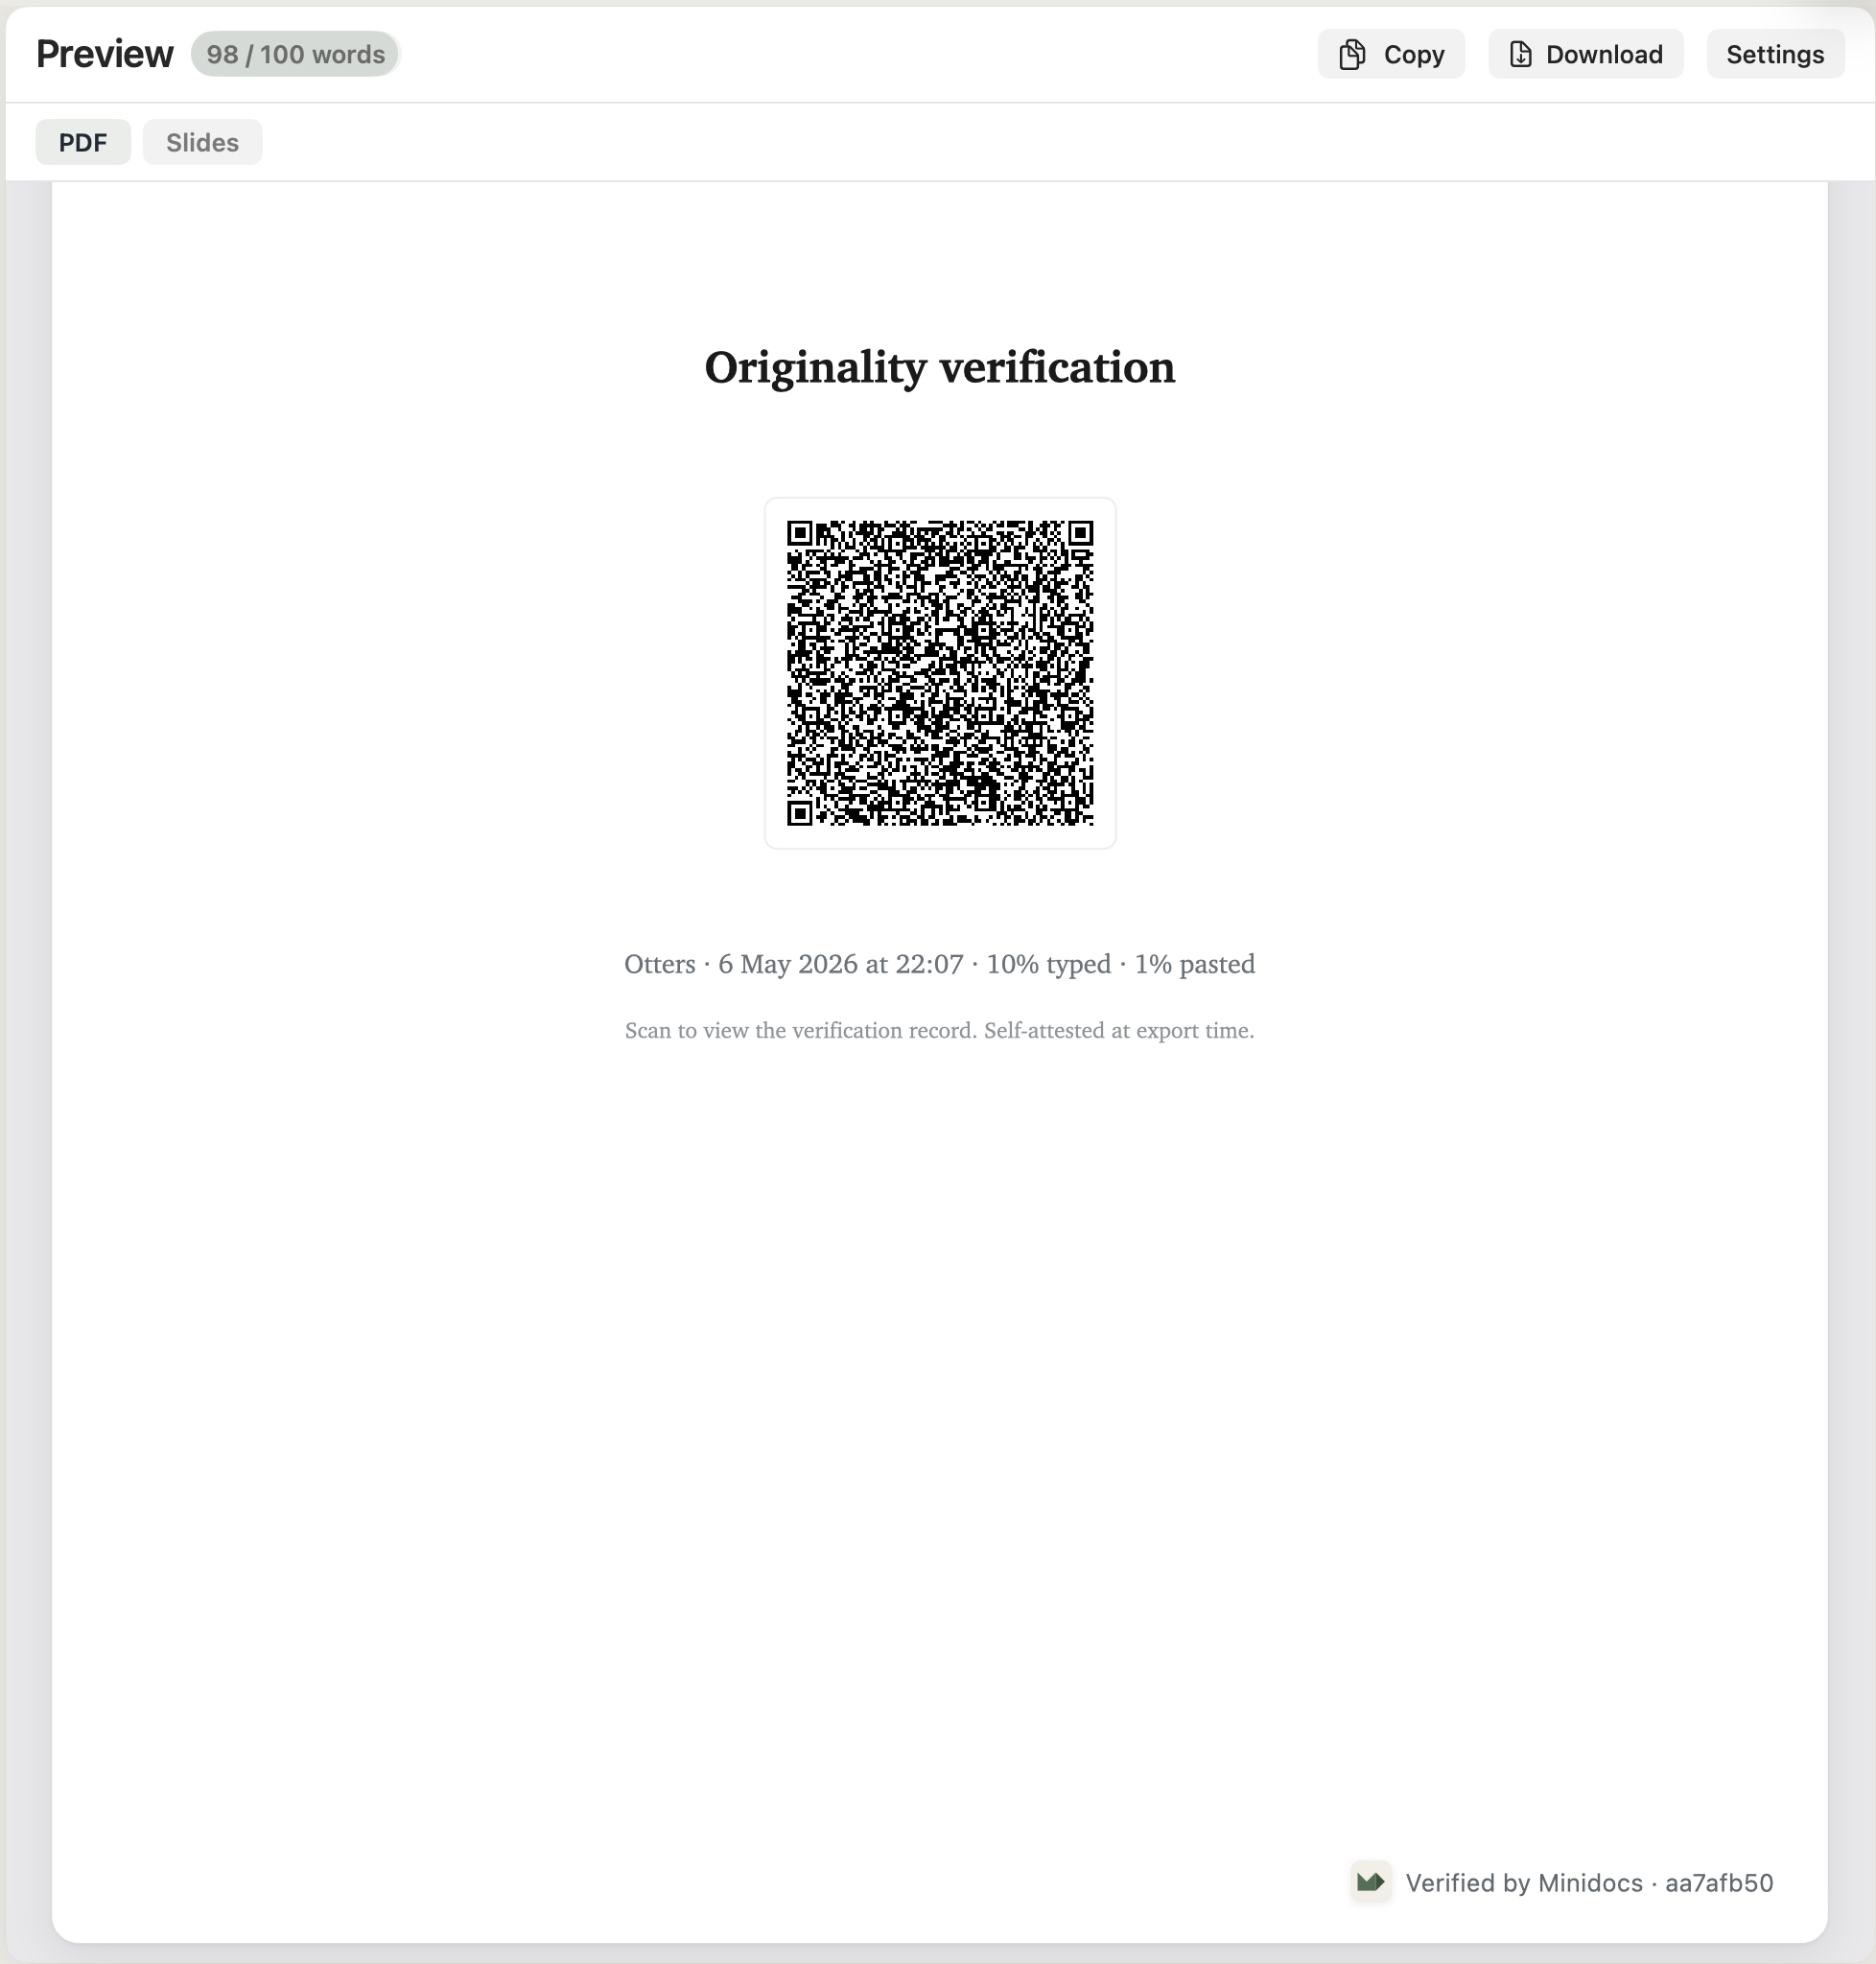
Originality
Originality is an opt-in, per-project mode that tracks typed-versus-pasted content and embeds a tamper-evident watermark in PDF exports. Each export carries an HMAC-SHA256-signed QR code that links to a verification page; anyone with the PDF can confirm it was produced by Minidocs and has not been edited since export.
The signing key never leaves your device. Read the full Originality reference →
Sharing and export
- Export PDF (⌘E). Renders the document offscreen with the same pipeline as the live preview, then writes a PDF to Downloads. KaTeX, Mermaid, syntax highlighting, cover page, watermark — all preserved.
- Copy as HTML (⌘⇧H). Copies a styled HTML version of the document to the clipboard. Paste into Mail, Notes, Outlook — the formatting (including KaTeX equations as inline images) survives.
- Mail handoff. The HTML clipboard works as a Mail.app handoff — paste into a new message and send.

Appearance
Minidocs follows the system appearance by default. Toggle between Auto, Light, and Dark from the toolbar (sun/moon icon) or with ⌘⇧L. The page surface stays paper-toned in dark mode — a dimmed parchment, not pure black — so the document always looks like the document. PDF export is always pure white regardless of editor appearance; your output looks printed.
Light
Dark
Keyboard shortcuts
Every menu shortcut, in one place.
Privacy and quiet
Minidocs is intentionally local and quiet:
- No telemetry. No analytics SDK, no error reporting, no event ping. The app makes no network requests of its own.
- No accounts. No sign-up, no Minidocs ID. Your projects are files in your iCloud Drive or your local Documents.
- Vendored renderer. Marked, KaTeX, Mermaid, and highlight.js are bundled with the app. Nothing is fetched from a CDN; the app works offline forever.
- Sandboxed. Minidocs runs inside the macOS App Sandbox with the network entitlement removed. The app cannot reach the internet even by mistake.
- iCloud container. When you choose iCloud storage, projects live in
iCloud.com.dgarhdez.minidocs— a Minidocs-only container. No other app sees them.
Need help?
Try the Playground for a no-install preview of the renderer, or visit Support for installation help. For anything else, email support@getminidocs.app with the macOS version, Minidocs version, and what you were trying to do.